Getting to the final coarse fitting of the RP grip to the Ruger frame. Bloodwood panels have about 5 coats of finish on them so they are resting in their last coating prior to final buff out tomorrow. I'm happy with the fit. At least as good as a pair of aftermarket grips. And nicely, plenty of extra wood to slim them down later and the frame will also accept all Colt Gen 2 and Gen 3 grip panels. Nice versatility.
The triggerguard is already mated flush to the frame at the vertical section of the grip panels. Nothing to do there but the tall legs of the backstrap need to be brought down and countoured to match the Ruger frame at either side of the hammer.
From above the course filing with needle files. Smoothing and countouring follows.
In the next two ya can see the trigger guard mated to the vertical and the backstrap mated to the horizontal.
Careful file work means a minimum of finishing. Here, 5 minutes with 220g backed on a file....ready for final buff up top and then probably, deglossing back to a 220 or 340 finish.
After a light sanding with 220g by hand to remove most of the milling marks....off to the buffer and brought it up to mirror bright. This finds all the nicks and boogers and then another sanding or light filing to pull out the boogers. Also sanded the sides to final fit with the Ruger Frame.
After that another buffing to mirror bright and then a light touch with a course wire wheel at 2100 rpm for a lightly matted/frosted appearance. \
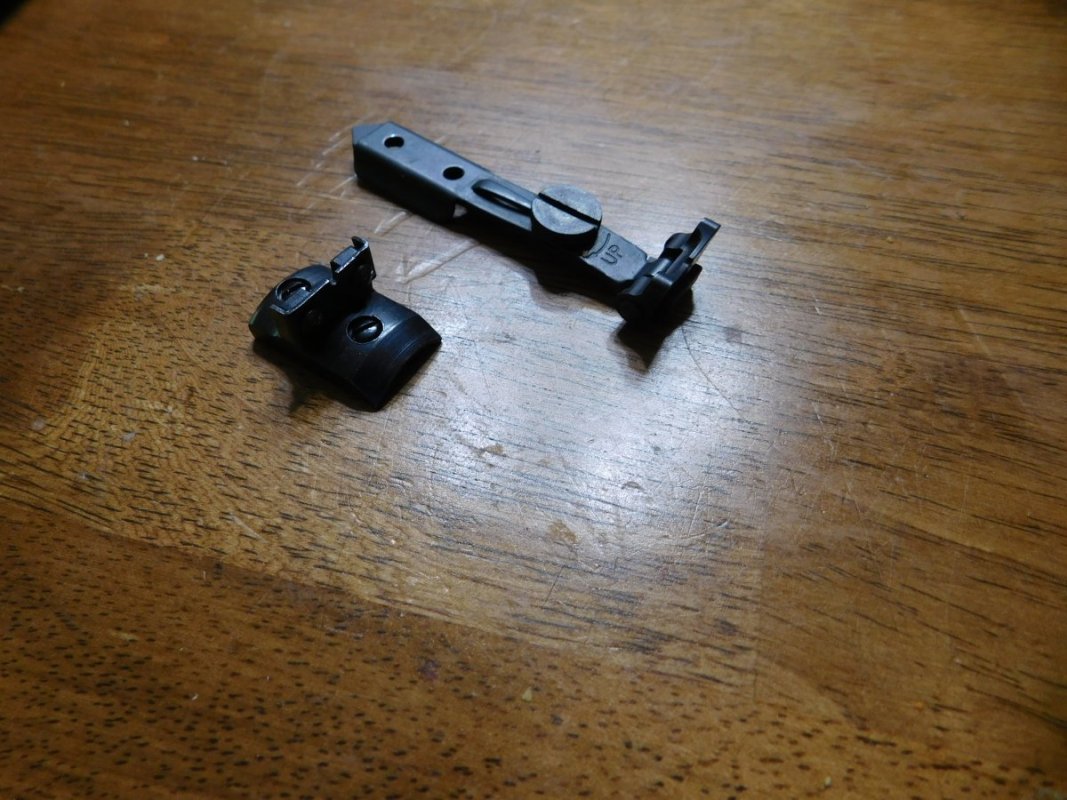
Time to finish up the wood grip panels and shim the locking bolt/trigger latch or fit a new latch.
I may have discussed earlier about play in the cylinder latch. Old guns get a bit of wear and the cylinder can be a bit looser than they should....a slight bit more rotation against the latch in the cylinder notch. Normal. (And single actions need a bit more looseness all over the cylinder than swing out revolvers in order to line up when firing and to insert and remove the cylinder. A bit more, not a lot.) Fit a new latch is one answer. For a Single Action Ruger, shim a good latch is another answer, even for a new revolver.
So....a stainless steel washer, turned by hand to 5/16" diameter (it comes with the needed 5/32" center hole) and blackmaxed to a steel flat and carefully stoned from .032" thick to .012 thick. Then polished both sides after removing with a touch of heat to break the blackmax bond. (Keep blackmax in the fridge after opening it so it doesn't harden up in the tube)
Lots of slop there between the trigger and the latch. Not a lot of evident wear on the parts, just lots of extra clearance built into the components.
The shim installed. I could even install a thicker shim, say, .015" to .020" but I function tested.....hammer slowly back and the cylinder latch locks/stops cylinder rotation when the sear drops into the fullcock notch. And, the cylinder has slightly less motion in it than my nearly new 1968 or 69 ish old model and my mothers coming along nicely NM Arthritis Project.
I may try one thicker shim, but this is good for now and once the sight is on the front, it'll go to the range once or thrice for testing before the final decision is made. So, a fix, specially if ya don't have or can't get or just don't need (this is the case here) a completely new or oversize latch (the window is fine as frog hairs, just needed some slop removed from the mix of components.)
Getting there ! When you install that latch shim, it went in between the latch and frame, right? The arrow in the pic points at the end or outside of the pin?
Also im guessing when the NM Arthritis gets completed, then you will be back onto this...(The Pimp Cannon...or Gentleman's Workhorse)
I enjoy reading your threads, learn what I can