Good work tonight. Settled on 4 5/8+ a touch inches for barrel length. Keeps some of the blast outta the face and not too heavy up front for weaker hands.
First cut is the hardest. Looks aweful but it cleans up nicely and will be as accurate as the shooter and gun can be. I use the dovetail sight jig to keep it straighter, less clean up later.
File work to clean up the hacksaws roughness.
Piloted 3/4" facing cutter. Squares the face to the bore. A properly fitted bore pilot all but eliminates chatter....the final passes are light and leave it almost babybutt smooth.
11 degree target crown cutter. Also on a properly fitted pilot. First turns are press in hard to cut away the rifling (those initial sharp edges will grab and chatter) and then progressively lighter to the finish for an almost baby butt smooth recessed crown.
The barrel, Shortened, Faced and Crowned....3/4 of the way finished.
A barrel beveler, to bevel the outside circumference of the barrel....no sharp edges there and no need to create a wavy line by trying to hand file the bevel.
Mounted in a drill, run SLOWLEY and rock it around like yer tryin to drill an egg shaped hole.....
Nifty neat-o a beveled edge, no lathe, nice and even and little or no final polishing work needed. At this point, if the gun were in good cosmetic shape, ya could blue the end of the barrel, install a front sight and go hunting.
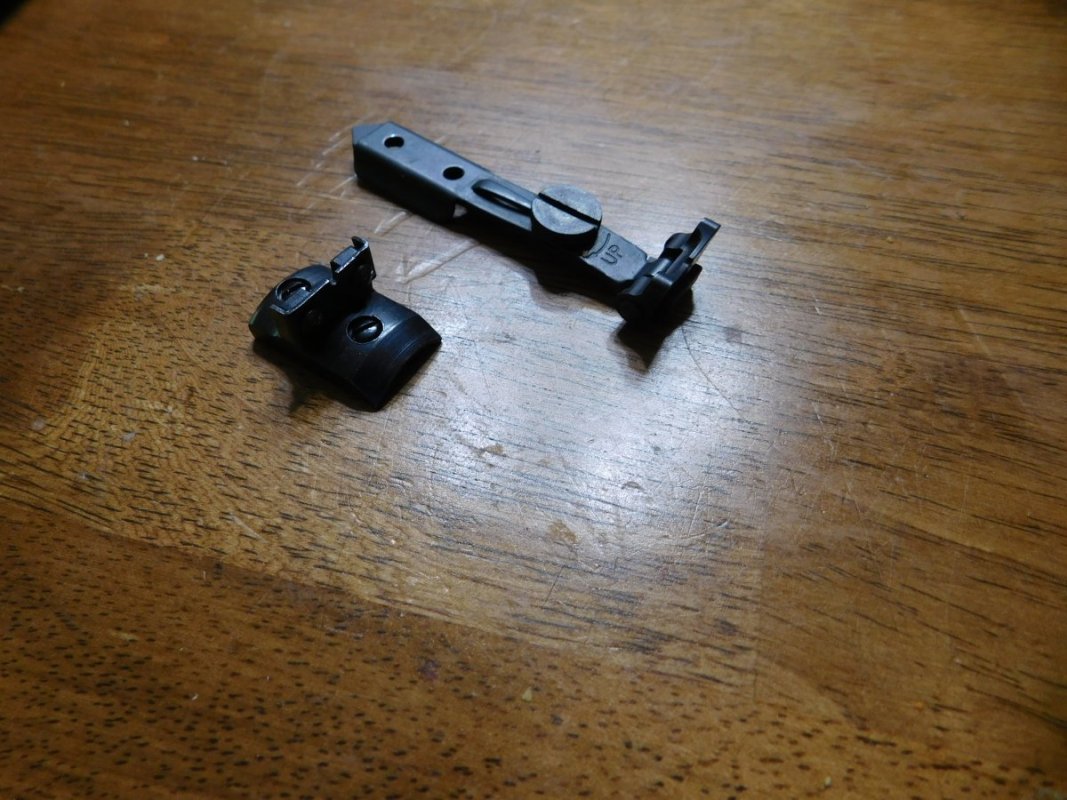
Front sight dovetail is tomorrow or Sat but for now, back together and looking much nicer. The Hogue open back grip may look good with a shorter barrel, sorta making the gun look like its leaning forward into the target. We'll see....I won't be sold on rubber Blackhawk grips till the new handler says its the ticket for her weakened hands.
Ya know what that nice low mounted rear sight pin hole means don't ya? Could mean Flat Top!
gotta have this un shootin for Mom by 29 oct. Can blue it later for christmas finally. gotta get a jig made up for the pimp cannon project too...its time to see if I can tighten the latch and to mount that buffler front sight....I hope it goes on straight. but...Moms first. just behind it all is my 3 screw. it may become a 44 special with a colt barrel or a 45 acp. first I gotta locTe an old model cylinder or retrofit a new model cylinder. it all keeps me busy
Why hand tools? The $ investment is smaller. The skill investment is no larger just different. The time spent on a good job can often be the same or less than the set up and truing of a lathe, mill, table or cross slide. You can often readjust and correct mid pass....difficult with power tooling.
Many say they don't have the time to do home gunsmithing. Most every job ya see done in these threads are 30 minute to two hour engagements spread over weeks. Not bad. I can find the time.
So, the front sight dovetail. With photos, 30 minutes start to finish. Maybe 15 minutes adjustment to snug fit the actual sight when it arrives....as the dovetail is cut small to allow final and true fitting later.
Install the jig and level it to the topstrap or some other part of the frame. I use the top strap, its the sighting plane ya see and usually plenty close to the same level as the bottom of the cylinder window.
Initial hacksaw cuts establish the front and rear undercuts. (357 mag Blackhawk barrels are plenty meaty enough for a very safe install of a dovetail sight. No worries, lotsa roof left over the bore)
Hacksaw plows out the bulk...hardened jig prevents going too deep and keeps the dovetail depth nicely the same from side to side.
Big mean file plows out whats left and bottoms the barrel dovetail at the jig bottom....file sings instead of cuts, yer at the bottom.
An triangular file cleans up the last of the undercuts. A safe edge triangle file also gets under the undercut all the way into the corner eliminating the flat spot left by the 3 sided file....essentially, making the dovetail as big as the jig and saving on some free hand fitting of the slot later.
The tools for the job. Jig, allen wrench, level vials, hacksaw, big file, triangular file, safe sided triangular file. Confidence.
The Try Sight. An old worn, butsted and loose fitted sight in the undersize dovetail....shimmed with a touch of electrical tape so it'll stay in while I sight the gun. For trying the sight...Try Sight.
Quick tour with the Try Sight. Lots of options out front. If the inbound sight is too ugly, perhaps it'll get an XS Big Dot Marlin front sight instead. Big dot oughta be good for older eyes too.
Operational View....Nice and straight up and down. No problem. Easy job. No mill, no power, no mistakes.