• ODT Gun Show & Swap Meet - May 4, 2024! - Click here for info

The Arthritis Project

Sharps40

Default rank <2000 posts
ODT Junkie!
4   0
Joined
May 17, 2010
Messages
1,948
Reaction score
1,023
Location
NC
NM Blackhawk 357 is inbound at a super price. It looks to be in fine shape so using basic proceedures outlined in prior builds and a few factory parts I aim to solve a series of issues that have come to confound a family members ability to defend herself.

Challenges include

1 small but recoil efficient grip for at least 38 Special +P

2 arthritus in small hands that requires 3 fingers to pull the current smoothed and reduced DA revolver trigger.

3 easy small hand actuation of the hammer

4 hivis front sight

Naturally the NM Blackhawk allows 6 carry, no slipped hammer when loading/unloading,safety of a trigger activated xfer bar and good heft (but not too much) for stable shooting

The Arthritis Project should be a very simple build. It will mostly be parts replacement and fitting. Selecting those that seem to work best with small and less dexterous and less strong hands.

Here it is....tracking across the Mountains into NC now. Should be here if a few days.

i.imgur.com_P1BqOJy.jpg


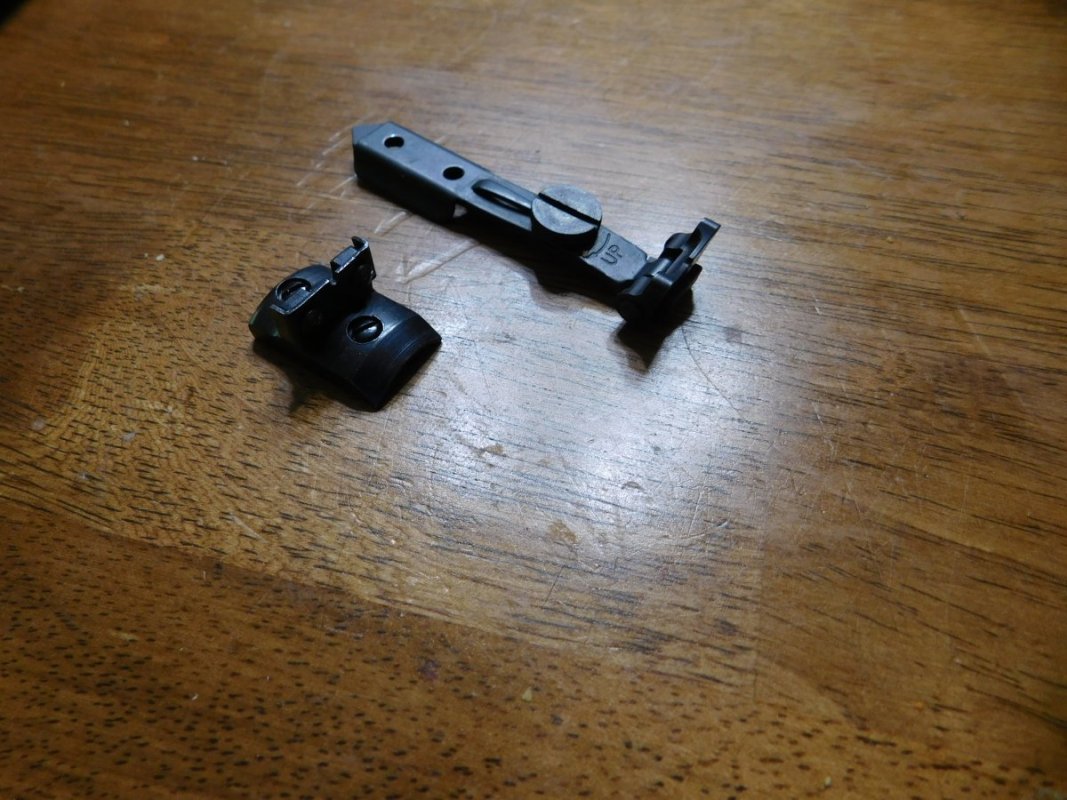
It will also need a rear sight, some parts are missing.

i.imgur.com_9Yvb7tm.jpg


Not sure if it will need a reblue. Its going to be a night stand gun to lay in on long term duty.

i.imgur.com_D8k5mvd.jpg


And, its too long. But it'll probably stay long enough for full ejection stroke, arthritis can also mean a loss of dexterity, 38s drop well out of these old blackhawks. But the first priority is safe and easy cocking and a single action trigger.

i.imgur.com_JDVuZ6P.jpg
 
Me too. Its beginning to hamper my fine skills and combine it with Ol Man Vision, ya got a lot of extra time in each project! Can't file as long, or sand or polish as long, can't see as well so you go back and file, polish more and ask the wife to look it over and all the files have GIANT handles on em now, and the drill press and polisher!!!! OMG!!!! Try to freehand something and BING BOINK its GONE Flyin!
 
Doing some planning. Will someone with a NM Blackhawk equipped with the FACTORY RUGER BIRDSHEAD GRIP, please take the following measurements. (I intend to compare them with various other options before deciding on a grip frame).

1. Distance from the center of the trigger to the forward facing face of the trigger guard loop (in a straight line from center of trigger and proceeding to the rear)

2. Distance from the center of the trigger to the backward facing face of the backstrap loop (in a straight line from center of trigger and proceeding to the rear)

-- Note: Essentially, 1 and 2 help me to calculate a length of pull and to determine center of various grips along a line straight back from the center of the trigger.

3. If possible, a length in inches from the bottom of the grip in a straight line up to the top plate of the grip....i.e. the height of the grip including the metal plate just behind the hammer.
 
Received the following measurements of various factory grip frames with wood and Hogue style open back rubber grips. It looks like the LOP issue is moot. All are about the same. Its also seeming, due to her love of the large rubber grip on the Taurus 66 at home, that an open backed Hogue on the factory plowshare grip might well be the control and retention ticket for weak hands. As for her, she's spending some time with the 66 and 605 comparing feel and retention and making notes. On arrival later this month she'll try out a series of plowshare and the lightning grip and we'll pick a final direction for the handle end. Needless to say, she's excited about being able to easily actuate the hammer and trigger and do some accurate steel slaying!

Standard trigger used in all grip frames, no bisley's in this case.

Grip Frame-----Front Strap & Rear strap from middle trigger parallel to bore

Birdshead--------------1.44" & 3.1"
XR3----------------------1.33" & 2.9"
XR3-RED---------------1.41" & 3.1"
Dragoon Hogue-------1.49" & 3.1"
Dragoon Wood--------1.53" & 3.1"
 
Arrived today. Tight and clean. Perfect bore and cylinders. Light wear on the bluing and moderate wear on the wood.

Some interesting things about this old gun. By the SN it should be a three screw....but its not. So, probably a 73 or early 74 model but the SN does not show in the range published by Ruger for the NM Blackhawks. I know its early because its an NXR3-RED grip frame, and the grip frame is in good shape with very few marks.

So.....to the photos and the first temporary repair.

Overall good. Light wear on the bluing and thankfully, old enough not to have an entire manual roll marked on the barrel.

i.imgur.com_7gbUMwm.jpg


Rear sight screw is missing, so is the rear blade. Scuffs and scars on the wood. (This one will require the low rear blade and a .530 high front sight when the barrel is shortened to 4 5/8")

i.imgur.com_3bqV72D.jpg


The EHR is in fine shape cosmetically. Probably won't need to work on it at all, I hope.

i.imgur.com_97GBMrj.jpg


A turn line on the cylinder but no pitting on the metal of this one....finally!!!!

i.imgur.com_BaSbfHf.jpg


Naturally, Johnnie Dorkwad just had to scratch a number on the gun......so.....it'll get reblued I'm sure.

i.imgur.com_d0837NI.jpg


And to the first temporary repair. When this one was made, the recoil cross pin hole was drilled to retain the firing pin bushing. Too bad but the hole does not intrude into the bushing space so, pin was driven in and entirely missed the bushing....only friction holding in the bushing, firing pin and spring all these years. Dry firing drove the bushing forward. So, in order to get the gun to the range, I drove it out.....rolled the bushing between two coarse files to lightly knurl its circumference. After cleaning the bushing hole in the recoil shield the bushing was once again a light drive fit into the frame. For the nonce, several light stakes help hold the bushing back in its hole. These stakes were lightly polished smooth to allow passage of the cartridges. This will get us to the range for test firing. If there is any slightest indication that the bushing will come loose, I'll drive it back out to enlarge the recoil shield pin hole and drive in a new and larger pin that actually bites the bushing and holds it firmly in place.

i.imgur.com_t2GnjkI.jpg
 
Back
Top Bottom