• ODT Gun Show & Swap Meet - May 4, 2024! - Click here for info

Next projects are on deck for

All the early Stevens Boys/Bicycle Rifles were inexpensive to own and inexpensively made. The Favorite is no exception in any original caliber. Folks to this day persist in chambering them for small centerfires and 22 Magnum and even now, the hot 17s. Big mistake in my opinion. Of the suitable rimfires, only the 22 LR is still readily available and suitable for the action.

As previously indicated, the action relys on two pins and a binding or overcenter relationship between the pinned parts for its lock up strentgh. As such, a well fitted action will snap shut and stay shut when fullcocked. It requires an unbinding or snap to reopen. When they are worn, and in 22 LR, the fingers of the shooting hand do double duty holding the action closed by the lever during fireing. There are two fixes. Both implemented by the factory, both dooable at home. Replace the worn pins with snug fitting new ones of lasalle steel or drill rod. Add a compression spring and plunger to a cavity drilled into the lever boss. The latter is much harder, even the factory only reserved this fix for a few of the rifles refitted when loose...as such, I've only ever seen two of the spring loaded levers in my life. One is fitted on a buddies rifle now. One is fitted on my mothers Curly Maple stocked 1894 favorite. The addition of the spring is a neat long lasting repair and if I had a mill, I'd attempt it here. But, usually, a simple set of new and well fitted pins is sufficient.


So, 100 year old pins to the left. New pins of drill rod to the right. Both pins were clipped long and finished on the ends in a drill press with a file. Each of the corresponding holes in the breech block and lever measured .150". The drill rod measured .154". A bit of polish was all that was needed to fit the new pins to a thumb push fit in the breech block and lever. (Incidentally, the original pins measured all over the place, about .135" at the largest...plenty worn and loose.) Final dress the pins to length so they are no wider installed than the part they are fitted to...

i.imgur.com_N6engON.jpg


The new pins installed....they will be staked in place after final refinishing. For now, an aluminum drift (nail!!!) is used to pess them in and out.

i.imgur.com_Nvyycy4.jpg


Once the new tightened up guts are reinstalled, the lever in fact snaps shut, stays shut when fullcocked and gives a snap when opened. So, another good repair on another good old rifle, just the way J Stevens Arms Co refitted them way back when.

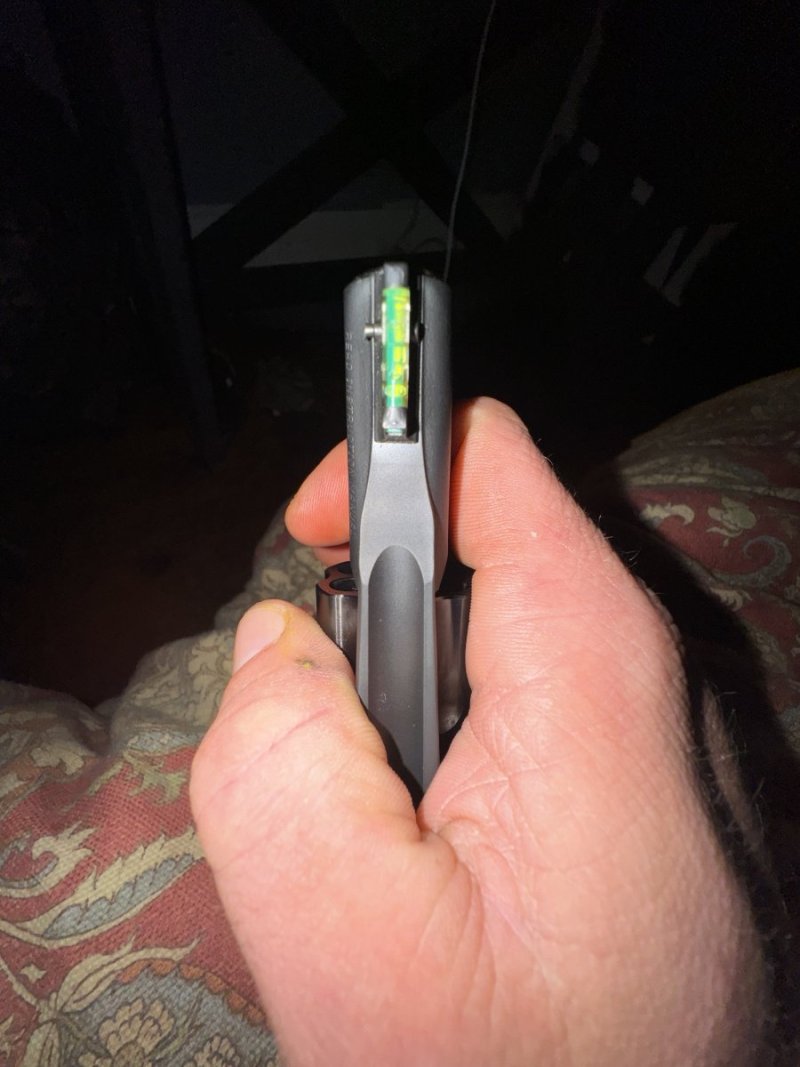
Gettin close now. A test fire. A decision on whether the extractor can remain as is (tip is a bit rough) and then its all about the refinishing.
 
Folks typically over sand a stock during refinish and rub away the original features...in this case the bevels at the wrist were removed from the original stock. Plenty of meat in the replacement so lets put the bevels back on. Like a Marlin 338 the wrist should finish larger than a smooth curve drawn around the tangs.

First mark out roughly where the bevels should stop at the full diameter of the wrist...about 1 inch back from the action on both sides.

i.imgur.com_EIDVXkl.jpg


Carefully, with a sharp chisel, pare away most of the excess wood creating a cone shaped bevel pointing toward the butt. Leave the stock proud of the action. These were not closely fitted guns, keeps down production costs. So just like a Marlin 336, the wood will finish slightly larger than the action panels.

i.imgur.com_d23tRTL.jpg


Beginning to smooth up and refine the left side panel with a file.

i.imgur.com_szVYJBN.jpg


Initial chisel work on the right panel.

i.imgur.com_RpvEOva.jpg


The rough shape of the panels from above after the tang area of the stock is filed down proud of the tang edges. When the file kisses the tang, stop with the pareing down, leave some wood for final shapeing and blending. Refinement of the shape and panel angle comes with more file work around the tangs and sanding before finishing.

i.imgur.com_jwE6iQK.jpg


A look at the right panel and upper tang after a bit more file work to round over the approach to the tang and further smoothing of the panel.

[Broken External Image]:

The wrist around the lower tang being pared down till the file just kisses the tang, don't remove the SN or other markings!

i.imgur.com_iqarlEf.jpg


A bit of smoothing around the nose of the stock at the upper tang to create a smooth transition from the tang up the nose to the top of the stock.

i.imgur.com_C3FDNpm.jpg
 
The view from below after some further shapeing of the wrist around the lower tang.

i.imgur.com_A5VRIi2.jpg


A replacement stock will usually be 1/16" or more larger than you want it. Thats good for fitting a buttplate. To remove burrs that developed on the inside edge of the buttplate during the initial install and to establish the final size and shape of the steel buttplate and subsequantly the stock, reverse the direction of cut as shown and lift the tail of the file. This puts a slight bevel on the cut, removeing the inside burr on the buttplate and pareing the stock into a taper that you'll extend from the butt forward during final shapeing. When finished, go around the buttplate parallel with the file to remove the bevel and establish the edge of the buttplate perfectly parallel with the line of the wood that will be carried forward to the wrist. The buttplate will come to its final shape at this time and dictate the final shape of the stock. Strive for a pleasing shape.

[Broken External Image]:

The size of the bevel being placed on the buttend of the stock shows how much wood is excess to allow for some shapeing and final fitting.

[Broken External Image]:

A little finger under the end of the 12" long file is about the right angle for establishing the final shape of the buttplate.

i.imgur.com_9z8OhIL.jpg


And here, most of the rough work done. Its pretty much shapeing and final sanding now.

i.imgur.com_VJ3M9WV.jpg
 
This is very dense and dark walnut. Read that hard. Hand sanding the initial shape and form is out of the question. Off to jitter bug land. But we'll start with 120 to move the shape to perfection slowely and to prevent lots of swirrlies that have to be hand sanded out later. The key? Keep it moveing, use the entire pad and don't tip onto an edge and create a gouge. Nice flat surface running forward from the properly shaped butt to the wrist.

i.imgur.com_Ykgmzqg.jpg


Both sides power sanded to final shape and ready for handsanding and whiskering.

i.imgur.com_WI5mSOE.jpg


If you don't wet the wood, sand off the whiskers and repeat untill the wood stays smooth when dried, it'll whisker up thru the finish later with humidity or a rainy day hunt....finish destroyed at that point. A bit of warm water and a low powered heat gun or hair dryer is what is needed to wet out the surface, swell the damaged fibers from sanding so they stand up and can be sheared off at the surface of the stock. If you are sanding thru to 600 or 800 grit, waisted time, fibers compressed into the wood, sealer won't penetrate and seal and you put in unnecessary hours and still have a lumpy stock on a rainy day hunt. 220 to 320 grit for the final sanding is plenty for 90% of gunstocks.

i.imgur.com_mmm7jWY.jpg


Wet the wood all over and start to force it dry with the heat gun. The formerly smooth stock will feel like its just machined.

i.imgur.com_VjwPeXv.jpg


Lightly hand sand, with the grain useing 180 or 220 grit paper. Then wet and repeat. Remember, don't bring the wood down below the tangs or action panels, two repetitions lightly sanded is usually plenty with the water....save room for one more final sanding before the finish, see below.

i.imgur.com_fuok50E.jpg


This or truoil is for the final sanding. Rub in a thin coat with yer hand. Rub hard till yer hand feels on fire and the wood feels dry. Let it set up 4 to 8 hours and when dry, gently cut the surface and any remaing sanding scratches that only slowely swell up in the whiskering process with worn 220 grit paper. After this, yer done with sandpaper, all further rubbin is by hand, by 0000 steel wool and finaly with fff rubing compound for a dead level finish that feels soft and has a satin glow.

[Broken External Image]:

The freezing/sealing coat rubbed in hard all over...we'll seal the inletting and under the buttplate later.

i.imgur.com_DjGgeYY.jpg


See, couple marks that didn't come up till the sealer coat swelled em, the sealer is thinner than water and penetrates better when rubbed in hard. These marks will come out too.

[Broken External Image]:

This buttstock should be done in a day or so.
 
Lets not make a new forend from the buttstock. Instead, lets save the original and keep this Ol Gal a bit closer to the Teens or Twenties when she was first made.

The crack is not too bad...gently open it to inspect for too much oil. Gently so it dosn't spread before we can stop drill the end of the crack.

i.imgur.com_xjQ4VYg.jpg


Not bad, I can see the end of the crack and know where to put my stop drill hole to prevent the crack from spreading further.

i.imgur.com_ykOQGVQ.jpg


A 1/8" hole bored thru to stop the crack...yep, another hole in the forend just behind where at least two sling swivels previously cracked and tore out of the forend....be patient.

i.imgur.com_bJQ18n6.jpg


Its good, we stopped the crack before it gets to the forend bolt. Plenty of strength left in this old forend...another 100 years at least.

[Broken External Image]:

Basic supplies for this repair....if I was doing a wrist or the toe of a buttstock, I'd use Acraglas epoxie for a repair stronger than the wood itself. This use of titebond will be at least as strong as the wood, if not more so for this low impact, more decorative than anything else wooden part. Just a place to put yer hand and control the muzzle after all. We won't put a sling swivel back in it either.

i.imgur.com_ODbUWl8.jpg


I spread the crack a bit more, gently, even with a stop hole, its old, old wood and tender!

i.imgur.com_X8Jt1YC.jpg
 
The glue and the wood at room temperature, let it run into the crack and out thru the other side. Help the coverage with toothpics as needed, coat the entire length of the crack all the way thru.

[Broken External Image]:

Finger as a putty knife, force glue in from the other side.

i.imgur.com_5Tb75qj.jpg


The wood will spring closed, an indication that the wood is still good, not punky or rotten, just dirty and abused.
A clamp made of gorilla tape is all it needs.

i.imgur.com_txRAXTr.jpg


I'll leave it set for 24 hours before doing any hole repairs and before sanding out the name Richard carved on the Right Side Panel.

i.imgur.com_52WSI7L.jpg
 
The foreend work was accomplished last night, posted this AM...plenty of time to dry up solid, so, hole repairs.

We need some walnut plugs for a 100 year old forend and I have a ruined 100 yearold piece of walnut to cut them from...

i.imgur.com_dM5TCRI.jpg


The remainder of this buttstock will be used either for old hole repair, ala more plugs or for knife scales. Either is a better choice than firewood.

i.imgur.com_2uTRmgS.jpg


I gathered the sawdust from plug cutting and sanding, mixed it with tight bond and used a 1/8" rod to pack the stop drill hole full of nearly color matching home made wood putty. Once set it'll be there forever and reinforces the crack end of the forend. The plugs are made and the counterbored holes drilled in the forend. This provides a significant surface area in and across the crack where the sling swivel screws tore out. Its also good for considerable additional strength and makes a fair looking repair...no sense tryin to pass this Ol Gale off as Original or Brand New, 'sides, it goes with the character of the gun...some flaws expected in 100 years.

i.imgur.com_oeMpPWc.jpg


Paint the holes with titebond and paint the plugs and press them in...a twist to align the grain and a tap to seat them well.

[Broken External Image]:

A sharpe chisel and a small smasherwacker remove the bulk of the plugs.

i.imgur.com_WxL6yzC.jpg


After a bit of light file work...once the glue is set tomorrow, this forend will be ready for final sanding and a complet refinish.

[Broken External Image]:
 
Back
Top Bottom