Lets see...original frame finish was case colors....lost over the years so we rust blued it...some pitting and scratches remain. Repaired the forend wood in order to retain at least half of the original stock. Rubber buttplate was long gone but we installed an original Stevens steel plate in its place. And a new wood stock. This morning I did the 4th boil cycle on rust blackening the barrel. The finish, upon carding was a nice light black and a bit translucent...like an old, old reblue. I set the barrel up with the rifle and looking over the whole package, really fell in love with the look. Overall, like a well cared for, well used and older restoration. I like the look so much, I decided this would be the last trip thru the rust blackening process.
Fresh from the boiling water, a beautiful even bloom of black oxides.
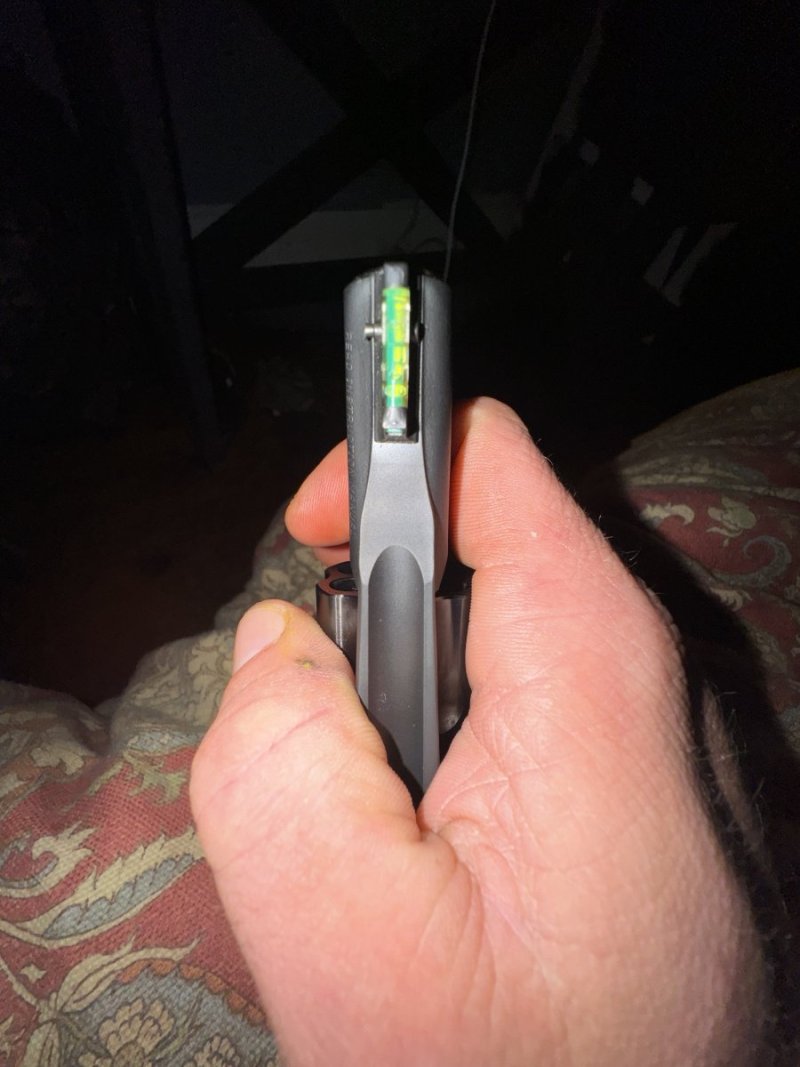
After carding, I installed the old stock replacement Stevens style rear sight.
I put the Rocky Mountain Stevens Front sight back in. The silver blade is long gone, long ago replaced with a hand rounded piece of steel. I polished the edges of the blade lightly to expose a bright edge for aiming.
Lightly greased with RIG. Photos don't do the finish justice. I'll get it assembled and see how it looks in natural light for some final pics.
Final Assembly. Barrel is in, retainer bolt tightened with a well fitting screwdriver. I checked the lever, it snaps over center and stays closed just like new. A good fit overall. When these loosen up to the point that the fall open, its time for new pins....again, the factory fix was new pins and an over center spring and plunger added to the lever. A rare fix since these were very inexpensive rifles and few could afford to ship them back for repairs.
Markings and a view of the all original action. Even the original spring loaded extractor retains functionality. I didn't get any misfires on the original tests and extraction was positive, so, except for the new action pins, buttstock and buttplate and sights, this one is as close to original as I could keep it. That's fine with me.
A closer look at the left action panel and its action screws...how these got thru nearly 100 years with out being buggered is beyond me.
Barrel and sights.
From the underside.
Here is the slight failure of the stock we discussed above...a small chip raised up, but still tight, just at the toe of the lower tang. It lifted in the time between final wood finish and installation of the blued action. I left it alone, its plenty tight and I won't be prying it out to glue and refinish the entire buttstock.
One more shot of the repaired forend. Two cracks opened, cleaned, glued and two tear outs from sling swivel screws repaired with walnut plugs.
TruOil or Laurel Mountain Forge Urethane. Hand rub, steel wool to level each coat, final buff to satin with brownells fff compound. There is no substitute for hand rubbing. But if yer doin TruOil, just let it dry, don't butcher the finish to a Whore Wearin Boobie Gloss (finish never penetrates, it will crack, craze and peal by golly) by topcoating with Armour All to force the finish dry in moments only...just rub the finish in hard by hand till yer hand is damn hot and the finish feels dry....wait 3 to 12 hours, buff with 0000 steel wool, dust, next coat hand rubbed in hard, repeat as much as ya like...I usually do 4 to 6 coats. Final light leveling with 0000 steel wool and a buff out to soft warm satin velvet with terry and fff. If ya want a browning high gloss, rub it out with fff and then ffff, like I said, there is no substitute for hand rubbed finish.
Thanks. I put it up for sale/trade locally. If it don't go I'll move it to GB and see what happens....Lookin around for another gun project and/or a good old Nova or Chevy II to daily drive now. Summers here time for lots of garage projects.