• ODT Gun Show & Swap Meet - May 4, 2024! - Click here for info

Adventures in Home Hot Bluing using the Blind Hog recipe...... Updated pics pg.4!

Railed 1911 - I have not had the time to rub this one yet, it's still sitting in baggies coated in oil. Wiped down for the pics. I'm going with SS Hammer, Safety, Slide stop and don't have all the parts in yet. Also need a nice set of thin bobtail grips to complete. Internals are Ed Brown, Wilson, Kimber, Fusion & NightHawk. Sights are adjustable sights from Ken sight. Various stages....

Still parked, checkering the front


493.jpg502.jpg

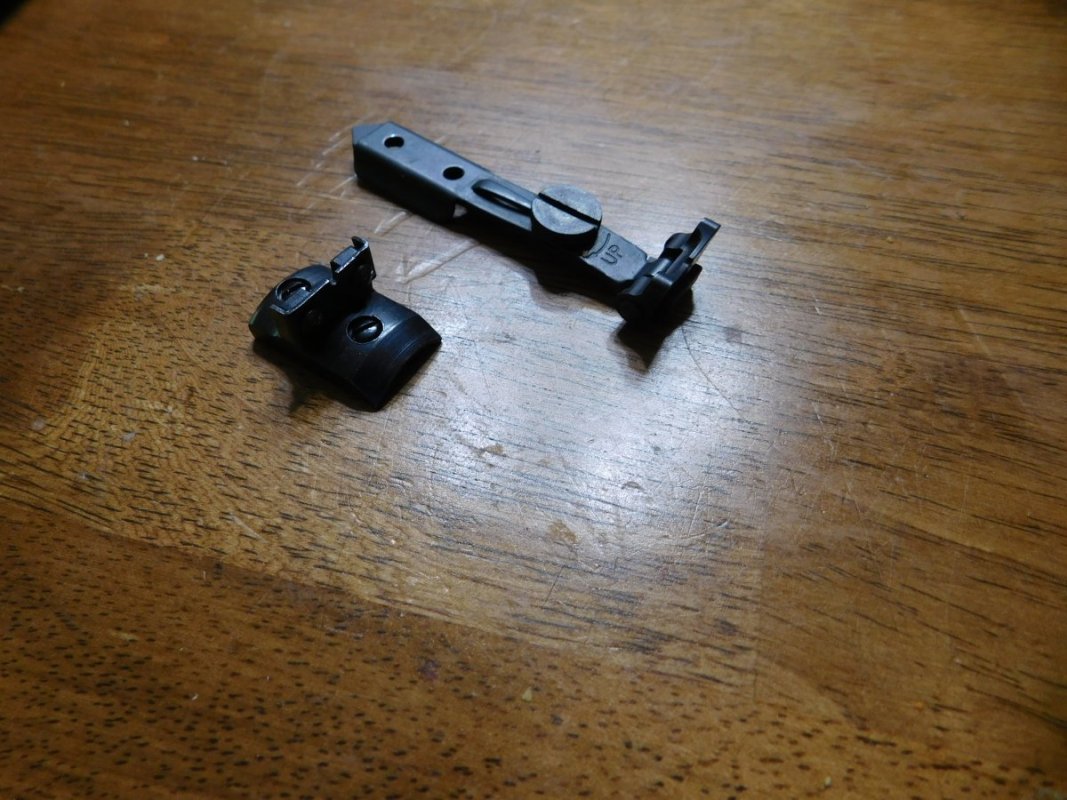
Polished Flats, Adj Sight Installed, Glass Beaded Slide

360.jpg516.jpg665.jpg

Ready for Bluing

128.jpg


Quick wipe to show flats

IMG-20120916-00191.jpg

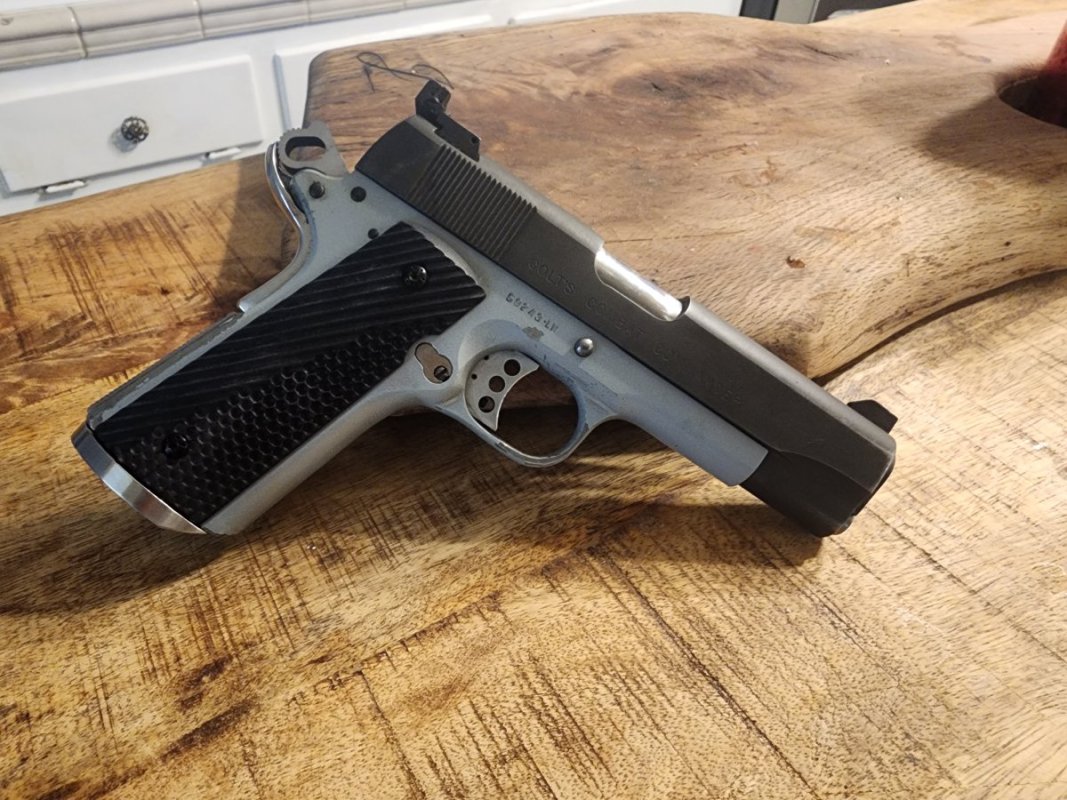
Checkered, Bobbed & Blued

IMG-20120916-00192.jpg
IMG-20120916-00194.jpg
 
Thanks.
For rollmark removal we used a bench mounted disk sander with 220 grit disk. I must stress to use caution when going this route, it is really easy to tilt the slide juuust a little and S***T you get a little ding or divot in the slide that will take FOREVER to blend out!! (dont ask how I know :mmph: )

After that its pretty easy but time consuming. I started with a large sharpening stone on the bench, layed oild 320 grit on the stone and moved the slide over the paper. Problem is, these flats aint flat, lots of small waves and variations in the surface that you would never see till you tried to polish it!
Finally settled on a wood popsicle stick wrapped in sand paper and progressing from 320 - 400- 600- 800- 1000 then buffing wheel with white polish. They looked like polished chrome!!! but every imperfection really jumped out at you:mad: So I started backing up the grits till I found a balance of even surface and nice polish.....Wound up with a 600 grit finish. (most manuf. stop at 400) so its still pretty darn slick.

Mark is very patient, I am not, that's where the bench mounted disk sander came in, after I clearly demonstrated how not to do it, the second slide was a bit easier but as mark said, very time consuming. Lots and lots and lots of rubbing.... The only thing more time consuming was checkering the front and I had to get Mark to help me put the finishing touches on that. Like I said, he is way more patient than I. Hand checkering is one of the jobs you get into and when you're about 2.5 hours into realize you've just gotten started. LOL
 
Last edited:
Looks great! thaks for the pics. Its nice to see it all together! Those first two pics scared me, then I realized they are before pics! Its gonna look great. The Stainless controls will really contrast nice on the frame.


Ken Ford and Dial1911,
The best thing about the salt recipe is everything was available locally at my ACE. The lye is drain cleaner (100% lye). and the Nitrate of Soda is just Hi-Yield 16-0-0 fertilizer.

There are no exotic or expensive chemicals and this does NOT give off Amonia gas like some others. (there were some pretty nasty looking fumes as we were adding the lye to the water that I wouldnt want to breathe, we wore respirators, were outside, AND had a fan going).
Its not "blue" but a very dark black. Much darker than parkerizing. I always assumed from looking at different commercial bluing setups that it was expensive and time consuming, turned out to be niether. Scott showed up around 11am, from hauling my gas grill out to the shop, setup, blue two guns and clean up was 5- 5.5 hours and we went really slow with everything. Im sure next time I could blue a complete pistol in about 2 hours total.
 
Last edited:
i like the black, much cheaper than the manganese phosphate I was comtemplating setting up, how the finish expected to hold up?

Good question, I expect it to have the same durability as any blued finish. That is to say, fairly good, but nothing exceptional as far as wear or rust resistance.
Parkerizing is supposed to be a more durable finish, but Ive seen some parked guns wear very quickly so I guess its all in the aplication.
Im sure there are modern coatings that are stronger, but I really like the classic look of a blued gun.
 
Last edited:
Stock RIA - 2011

IMG-20120922-00212.jpg


Well, finally got it back together. Much gratitude to Mark for his patience with me and his amazing skills with detail.. (:

Sorry for the fingerprints on the slide... Had to take the pics and we were in a hurry.. LOL


IMG-20120922-00209.jpg
IMG-20120922-00206.jpg
IMG-20120922-00207.jpg
 
Last edited:
Very nice and clean. It reminds me of the Coonan 1911. The nitrate and lye form an alkali salt solution that is a "hot bluing" method. Granted the results are more deep black.

http://en.goldenmap.com/Bluing_(steel)

Did you soak your gun in oil over night immediately after removing it from the salts, rinse then oil process?
 
Last edited:
Rinsed off salts for 15 seconds, then oil bath. Mark had his covered with oil for a few hours, I left mine in a liberaly oiled bag for a week. They look the same.
 
Rinsed off salts for 15 seconds, then oil bath. Mark had his covered with oil for a few hours, I left mine in a liberaly oiled bag for a week. They look the same.

Then they look great! Your pics made the finish look a bit off-color like a grey. So how does it shoot?

I like those Kensights (Novak style adjustable). A couple of years ago I looked long and hard at them for a Springer project and they are in Atlanta, Georgia. If able I always try to show some love for our local boys.
http://stores.kensight.com/StoreFront.bok
 
Back
Top Bottom