• ODT Gun Show & Swap Meet - May 4, 2024! - Click here for info

1860 Army Blackhawk

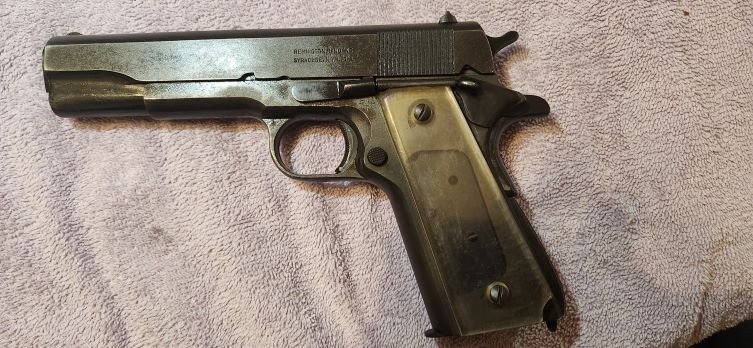
Coming. Simple gate mod today I think then awaiting wood and a stud to finish the ejector housing mod and polish and blue. Betchyer behind I'll prolly shoot it soonas I can get a grip out back and well before final polish!
 
Stainless steel is great. It holds a polish nearly for ever. It holds scratches nearly forever too. After a good buffing, a dull factory hammer comes up to a mirror shine and is ready for jeweling.

i.imgur.com_xoFtLr2.jpg


i.imgur.com_FChQuiX.jpg


i.imgur.com_WcoLRBq.jpg


i.imgur.com_j80BzAw.jpg


And a simple but functional modification to the loading gate. Its a thick chunk of metal....rather like an acorn with a hinge. A bit of work on the backside makes room for the thumb to be inserted and flip the gate open. Its not a visible modification, just one that helps guide the thumb in to place to positively get it open....its nice when you are wearing gloves on a cold day.

i.imgur.com_A6iuwc4.jpg
 
I spose I can start polish and blue on the small parts and cylinder this weekend. The sauce is in and so are the studs needed for the ejector rod housing. But the bloodwood could be from 5 to 21 days from order before it even ships. Slow boat from South America I spose. Got some finish work to do on the brass triggerguard too so, might as well get a bit of synergy by working two issues at once.
 
Ruger parts are cast. There are parting lines. On the hammer, they are left on the face. Where the nose rests on the frame and where the step impacts the transfer bar. The left side is taller than the right. That means the frame and transfer bar is hit by the left half of the hammer each time it falls. I'll even it out so that it doesn't eventually pound a dent in the left side of the impacted parts.

Here it is....the face of the hammer, as received from Ruger is the only part of the hammer not machined...its left as cast on the replacement parts. (On my factory hammer, the nose and step are polished/fitted for an even blow) You can see the mold parting line down the center of the nose and step. It has sharp edges which would need dressed down anyway.

i.imgur.com_kobDCGp.jpg


About half way thru the stoning of the hammer and we see, the left is taller than the right (The low spot is in the center). I'll stone it down even and then do final checks for transfer bar pinch and firing pin protrusion and make any needed adjustments to either or both of the nose and/or the step.

i.imgur.com_JYPkuhB.jpg
 
And the hammer stoned to the 90% level. Shortened the nose a bit to improve firing pin protrusion and no pinch. Last steps will be to pull the hammer and make a few swipes on an Arkansas stone to even it up and final spot check it into the frame/transfer bar with a touch of Prussian blue.

i.imgur.com_A5UPXU6.jpg
 
No work on this one today. Went looking at a new house with 20 acres of hardwoods on it....lovely I want it! But gotta sell my place first. In the meantime, I scrounged up an old 45 caliber muzzleloading jag that no one uses anymore. I think I'll machine it down into a solder in plug for the trigger guard front screw hole. That'll let me redrill and countersink the hole about a half a diameter to the rear and get everything lined up with the frame thread. But first, I'll start early tomorrow morning prepping the cylinder and all the small parts for rust bluing. The garage is 90% humidity and perfect for rust bluing but it sure slows down the drying of the fresh primer and paint I put on the floor of John Lee....his original rubber mat and tarpaper are all inna garbage now. Prolly gonna finish with some mossy oak camo insert floor mats and maybe a black rubber pad over the hump or maybe a camo pad over the hump. I ain't decided yet but the ol blue 65 truck needs a touch o camo.
 
For rust bluing. Small parts are spray degreased after polishing. In this case, the parts are new, unpitted and polished to dull 150g to 220g and then matted with a wire wheel. They are ready to rust blue.

i.imgur.com_UTch6EA.jpg


Larger parts with lots of hiding places for grease and gunk, spray degreased then boiled once in clean water. After which they will need a final polish or wire brush to remove instant rust from boiling.. In the case of the cylinder, a wire brushing of the flutes and a 150g finish on the surface of the cylinder (some light freckeling on the surface just a bit deeper than I want to polish out.....so, mute them a bit in a matt finish.)

i.imgur.com_iP2EIWn.jpg
 
Instantaneous rust from the cleaning boil. I polish it back off....handling everything with a clean barrier between my hand and the part. No oil now, no spots later.

i.imgur.com_M7Qfqyl.jpg
 
Parts cleaned, polished/brushed and ready for rusting. Humidity today in the garage is 85%. Perfect for fast rusting. Should be able to do several cycles today.

i.imgur.com_2xO0PWe.jpg


Everything is handled clean from here on no matter how bad it looks. (Rust in the bore questions/plugging holes questions...refer to answers in other build threads please. Short answer is No and No.) No finger prints now, no finger prints at the end. First coat is wet and doubled and then left to rust for one hour. (All subsequent coats will be nearly dry. Rust inducer is also a rust remover. Initial cycles of rusting will be one hour, several three hours cycles alternated with 12 to 24 hour cycles. If the humidity and schedule stays up/uncluttered....could have all the small parts shown fully blued, carded and oiled by Wed/Thur.

And the first kiss of pilkingtons produces instant rust and a lot of black iron oxide, which is what we want.....due to the high humidity.

i.imgur.com_EecGC9Q.jpg


Same for the other carbon steel parts.....all but the ejector rod cap screw I made up....its going to fight rusting....hope it ain't stainless!

i.imgur.com_lsJTNTm.jpg
 
Back
Top Bottom