• ODT Gun Show & Swap Meet - May 4, 2024! - Click here for info

1860 Army Blackhawk

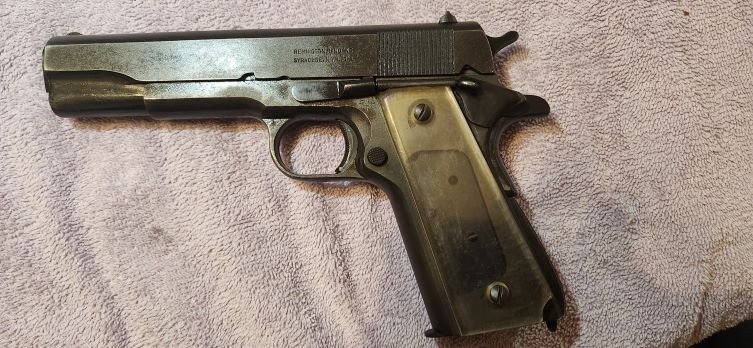
Good news is all the parts are rusting nicely, nothing made of stainless! 20 minutes after wiping on the second dry coat of pilkingtons, a nice even and fine grained bloom of rust. I'll do first boil about 1130 to 12 and we should be able to rust and boil twice more today.

Good Southern humidity and no damp box needed to make rust.

i.imgur.com_bBEXB7l.jpg


i.imgur.com_FomO2I0.jpg
 
Pretty apropos using a muzzleloading cleaning jag to fill a hole in a muzzleloading pistol grip.

Tapping the existing hole 10x32 to hold the jag for soldering. Just enough lip to catch one thread and solder will hold the soon to be modified jag in place permanently.

i.imgur.com_LD4j1am.jpg


Meantime all the small parts are back in the iron pot on their second boil and I'll get them carded and rusting again before modifying the jag to fill the hole. But, the thread is good and I can screw in the jag snugly for soldering later.

i.imgur.com_4FkVexo.jpg
 
We'll finish up the install of the 1860 Army Colt grip frame to the Blackhawk and repair a stripped hole in the frame at the same time....mighta been one reason for the good price!

Off to the shop, muzzloading cleaning jag cleaned with the wire brush and then installed in the press and cut off the excess then turn the head down to the right size to just barely fit in the hole and countersink in the Army Colt front hole.

i.imgur.com_F2eK3V8.jpg


You can't see it but I have heated the new plug and tinned it with solder, threads and head. The fit is tight and it'll need some help pulling solder into the gap so a bit of it on the part in advance will draw more in by capillary action. Rosin core lead solder is fine for this job...there are no shear forces to worry with and the screw samwiches the plug.

i.imgur.com_n5ms7SI.jpg


After soldering and filing and a bit of sanding on both sides, the plug is in with just a light ring of solder in the gap....buffing will make it nearly invisible and much of the ring will be under the new screw head when completed.

i.imgur.com_UIb6thZ.jpg


The forward screw hole is stripped in the frame. A small bit is used to mark the new location for the replacement screw. The screw hole on the ruger is about 1/2 screw diameter rearward of the now plugged colt screw hole. Its a 6x40 screw on the ruger and rather than tap it 6x48 and have it strip again, i'll take it up one size to 8x40 when I'm done.

i.imgur.com_Ujcx0k6.jpg


After the new hole in the grip frame is drilled and then the stripped hole in the frame is drilled, its assembled, lined up and tapped 8x40 clean thru.

i.imgur.com_gWYrbpD.jpg


After adding a countersink for a fillister head screw in the Colt Grip Frame, at the correct angle, the screw head is thinned and domed and the slot deepened slightly. Its then run in so I can mark it to see how much to remove. Nicely, all the holes line up and the 1860 Army Colt grip frame is so close to the same width of the ruger that almost no work was needed to fit it to the perfect width.

i.imgur.com_wLMCAva.jpg


Installed, the grip frame is rock solid. The front screw is nearly perfectly timed front to rear and I'm loving it. Nothing to do now but finish work!

i.imgur.com_wb8Q8rN.jpg
 
Pretty much got the nosing done on the top strap. Its the look I wanted....barrel appears to be mounted in a sleeve with a topstrap growing out of the sleeve.

i.imgur.com_W2VjXc3.jpg


i.imgur.com_OFNavpk.jpg


i.imgur.com_hPNifAD.jpg


And the first of the parts that needed touch up bluing and/or small area bluing (the inside of the hole I drilled in the Story Ejector to make it a Ring Ejector button) and the cylinder pin are done and resting in oil while the remainder of the small parts continue to rust and blacken.

i.imgur.com_Ed4yWEb.jpg


Overall, a good deep black. More black than grey and I'm pleased. If the rest turn out as well, it'll be a pretty good looker.

i.imgur.com_nYHFIAQ.jpg
 
The small parts and cylinder look pretty great this morning after another boil and carding. The high humidity and air temps have really helped the process along. With luck, the bloodwood will arrive today/tomorrow and I can get rolling on the grip panels.
 
Ruger soup. Final boil and blackening for the cylinder and steel ejector rod housing.

i.imgur.com_QlTy2zE.jpg


Clean up supplies. Even at this stage, oil and grease for last and don't fingerprint it while carding...it'll finish uneven. Clean the tools, clean yer hands, barrier between hand and steel and card off the loose oxides. When that is all done, then grease/oil and set aside to rest a day.

i.imgur.com_pnWTxqj.jpg


If you never thought of rust (bluing) as rust resistant and durable, look at the blued gun screw on the left. It was blued before. Its been thru 6 boils, numerous exposures to acid based rusting agent, left in an 85% humidity garage for days....and it looks pretty decent. Bluing steel is a finish that will pull the whiskers off the faces of them folks that paint guns.

i.imgur.com_wFBURsx.jpg


On the right half the loose oxides carded off with 0000 steel wool.....the left half to be completed.

i.imgur.com_9wMfokR.jpg


Again, left half as boiled and right half carded. The bronze tone and sometimes, little silver flecks I've always taken as an indication that the steel has had enough and won't get any blacker no matter what.

i.imgur.com_gZqiRE2.jpg


And for those that just refuse to believe....after a very light cleaning with a brush and no oil to hide any flaws, the interior of the cylinder is a good and clean and shiny and not blued and not pitted or even freckled as the day I first dunked it in the hot water.

i.imgur.com_DxT0hCC.jpg


A mix of Rig grease and Hoppes 9 oil in and on every surface and let it rest for 24 hours.

i.imgur.com_B9XwdSK.jpg


Another shot inside the cylinder. This time from the front and oiled. Perfect. Ready to fire many many rounds and look good doing it.

i.imgur.com_64nkUZ9.jpg
 
No work for tonight. GoodWife bought Jiffy Pop wif butter and made sweee tea. So, we's watchin the Way of the West on Amazon prime....good and scary what Amazon can do. Got an email today..."We noticed ya had lots o trouble streaming The Way of The West the other night so we's refundin yer money and when ya get it fixed ya can watch it again."

Its cool they refund the money on an incompleted flick unasked. Its scary that they: 1. Know when I have trouble streaming the shows. 2. Send me emails in broken English jes like I types.

But, the bloodwood arrived. Only two days late cause the package was small and UPS dropped it with USPS for a 48 hour delivery delay.

Dense and heavy and very tight grain it polishes to a moderate shine with sandpaper only. It makes awesome knife handles and finished with Tru Oil or a Clear urethane it will not brown....at least my 15 year old handmade bloodwood handled skinner ain't browning. I spect its like any wood, darkens with age, even pine turns a lovely toast color but this should stay red longer than I'll be around.

Gonna make nice looking grips. And if the saw is sharp enough to resaw it into thinner slabs, maybe a nice bloodwood lidded presentation box.

But its sure it'll be a pair o heavy, dense, very strong grip panels that'll go on that brass frame and should look kinda purty with the black color of the frame.

i.imgur.com_bg5tzEK.jpg


i.imgur.com_gKNmJSB.jpg


Wetted to show the hints of yellow that come out when finishing. Might needta order more for a table top.

i.imgur.com_DvbKuLH.jpg
 
Back
Top Bottom