10 Millimeter Madne$$ or did I screw it up?

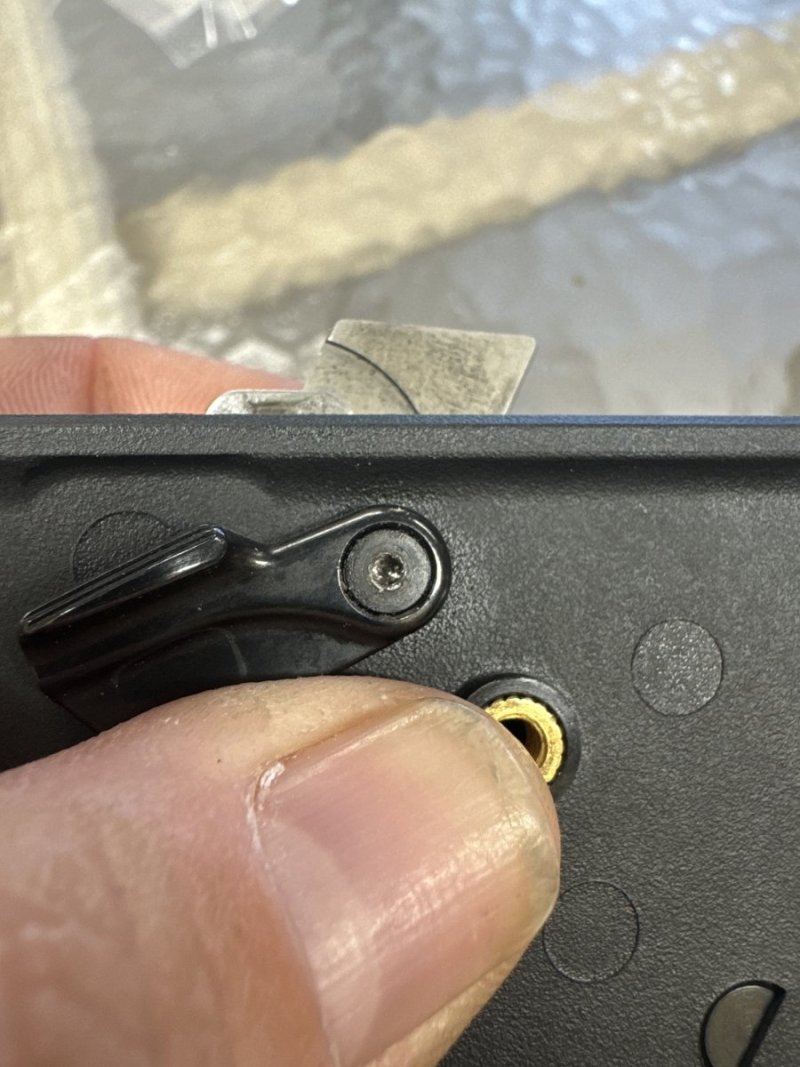
Are the post holes drilled all the way thru as well?


I would try and make a paper layout ..... put a piece of paper on it then rub with a pencil to trace around the holes ... then punch them out with a hole punch the right size ... from there lay the paper on the slide.

Or make some small posts to fit in each hole with a point on them in the center of the post, insert the posts into the hole, .... dykem the slide.... use the point of the posts to make the location for the holes in the dykem... then put the slide back in the mill and mill the holes big enough to tap.

No sir the post only go up about 1/8" and stop. They are just studs helping secure the sight. Thanks for the suggestions both seem reasonable options if I can't get a system that is more accurate.
 
Ok Nate, here is some "Shop Porn"..Bow, chicka, bow, wow!

It's a Sears Model 101.07301 it was refurbished recently but is about 60 years old.


i45.tinypic.com_24zei34.jpg


i50.tinypic.com_2e0tnvm.jpg


i48.tinypic.com_10fywbk.jpg

That is a lovely machine! And the bench it came with is great also! How does it run?
 
glock.jpgHere is my longslide 10 mm. I posted it awhile back. Has 6.6" Lonewolf threaded barrel, Lonewolf Longslide and burris fastfire II. I cheated with a burris glock mount. I really like the gunsmithing done on the sight mount on your slide, much cooler.
 
Nate the lathe seems to run great but I'm a knob and it's been thirty something years since I ran a lathe in metal shop class.

Moving forward, the hurdle and reluctant issue was positioning 6 screw holes and not being off as to mount the optic. The easy way was to mount an adapter plate but that would elevate the optic (same as Burris). Without special tooling to precisely measure the center points of the 6 required holes I was at a standstill that is until I had an epiphany.

Clear Plexiglas plastic!

The template marked and eyed with great concern. The center points were eyed out and marked on the plastic and served as reference points to drill holes in the slide.


i45.tinypic.com_15ockrq.jpg


i48.tinypic.com_30hvii8.jpg


Let's get this party started!


i45.tinypic.com_5p0mti.jpg


The holes are threaded and straight! After tapping all 6 holes one hole seemed a bit short and a bit too much pressure then the tapping bit snapped (insert foul language). The bit is seen in the middle upper hole. Thanks goes out to Acmech who had small punches and was able to punch it out. He has been crucial to making this happen.

Murphy is alive and well.

i50.tinypic.com_kb05u.jpg


Thanks Nate for the line on 120 grit Aluminum Oxide blasting media. Grainger in Norcross was the only place in ATL that had it on the shelf. That allowed me to finish this project today.

An inexpensive air brush and a couple of filters kept the water out of the coating (CeraKote).


i46.tinypic.com_35bwcup.jpg


Sand blasted and oil free, good to go in my home made paint booth (cardboard box). The Cerakote instructions were excessively generous with the recommendations of amount required for coating a pistol. My slide, I only mixed up 15 cc of coating and only used a bit over half that with the air brush set to 30 PSI.


i47.tinypic.com_15g40t2.jpg


Cooked the CeraKote for 2 hours at 250 degrees.


i49.tinypic.com_qntbwy.jpg


Red loctite the screws in and cut them off. Hand filed the excess off until the red dot optic sight hard fitted on the four contact points then secured with two mounting screws. This took most of the evening yesterday and this morning to get right.


i49.tinypic.com_of3dip.jpg


more to come
 
Last edited:
Back
Top Bottom