• ODT Gun Show & Swap Meet - May 4, 2024! - Click here for info

Marauder Restyle Part Duex

Finally, parts and supplies have arrived so I can dive into the Marauder Part Deux and get started on that TC Renegade Refinish!

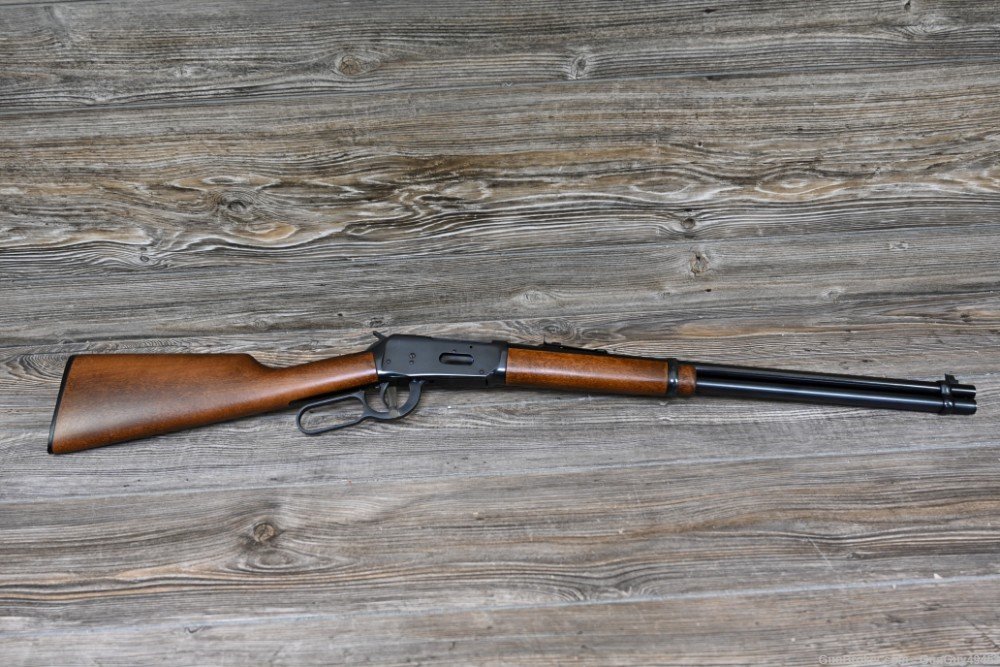
Here we go...Winchester 1886 on a Marlin 336...straight grip conversion coming so this Marlin will emulate the perfection of the Win 94 both in sighting and in handling, one day soon.

[Broken External Image]:

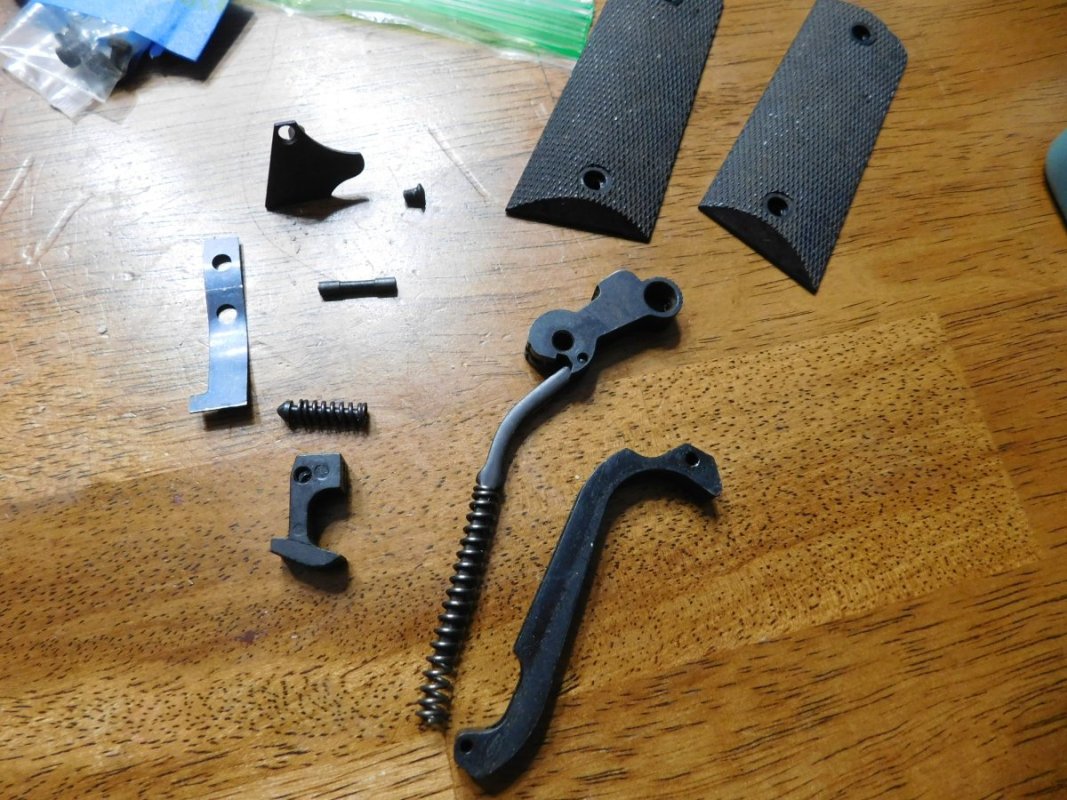
New walnut, straight grain for strength with some lovely golds, reds and greens...gonna look darn fine when hand rubbed to satin perfection.

i.imgur.com_KOM8Xhi.jpg


i.imgur.com_ZoNkfNc.jpg


This is what I like to see, interference fit from the word go...room to fit it snug and no glass bedding should be needed...we'll even have to drill it for the tang screw.

i.imgur.com_fFJbsMq.jpg


i.imgur.com_nqEV8SQ.jpg


i.imgur.com_40gFeLA.jpg


Yeah baby, gonna look sweet and shoot sweet and handle sweet and be way better than it was from the factory....back to 1963.
 
Going well...stock is rough fitted. Want this one to come along to a point where I'm refinishing wood so I can simultaneously fit metal parts on the separate Renegade project and then polish both for simultaneous bluing. But it may or may not happen that way. In any event, no hurry on either of these projects.

This is a well done preinlet stock for the marlin. The only fitting was a whisker here and there inside the inletting and shaping the wood tangs that fit inside the action panels...and a lil recess down low in the rear to clearance the mainspring shaft.

i.imgur.com_FudiyCc.jpg


Here I've scribed the line on the lower tang where metal will be removed to facilitate the straight grip conversion. This effectively reproduces the marlin Texan tang. There will be no loss of thread for the stock screw.

i.imgur.com_DIRSwCK.jpg


The factory inletting leaves a very slight gap at the action panels, no worries, its at least as tight as the factory Marlin fit, so I'm pretty happy with the fit and the look will be as folks expect on a factory gun.

i.imgur.com_txSeVVA.jpg


Upper tang fits nicely, just a tiny gap at the rear, normal. The stock will be on and off about 40 more times in the fitting and finishing process, so this might even close up a bit more...its still pretty snuggy tight at this point.

i.imgur.com_MQitXF5.jpg


Lower tang also looks much the same. The fit is good and both upper and lower tang make full contact with all clamping surfaces of the inletting.

i.imgur.com_BFpjDGs.jpg


None of my Marlin buttplates are worthy of reuse...most are old enough to have been ground to odd shapes in former refinishes. So, just centering up and adding the old style single slot screws for now. I may get another marlin buttplate and I may make a nice steel buttplate and rust blue it with the rifle or ......

i.imgur.com_QCjy5Gm.jpg


So, assembled for now, this is the drivers side view.

i.imgur.com_tFufEPA.jpg


And here is the Wrong Handed Drivers Side View...No apologies, Sister is a leftie so I can pick scabs if I wanna.....

i.imgur.com_copnDoG.jpg
 
Lotta nice color in that walnut, it gets lost in the photos but fine pores and lots of gold, red and a touch of irridescent green. It should show better when handrubbed.
 
Wait'll that goofy bent lever gets straightened out for best looks and most assuredly, best performance! Then she'll be Hot! Leanin toward a marlin buttplate....I wanna keep the early 60s look about it. Love the fact hers is the chunker buttstock though....overall, the very slightly more girth on the buttstock gives the gun a shorter overall appearance, and no reduction from the standard length of pull! Nothin like a lil extra junk in a Gals trunk to augment the looks of the entire package.
 
This is coming right along and it looks good.You don't think the barrel band screw will stick out to far and detract from the overall look?(The head, I assume you will cut the other end)

That screw gets trimmed on one side and dome headed on the other....smooth and unobtrusive and no snag.
 
Got three deer in the freezer, till I locate a butcher no room for more so....back to work on rifles.

Here we go, pistol to straight grip conversion....

Factory pistol tang on this gun....SN is under the White, we'll stay off it....all the work on the tang is from the scribed line back.

i.imgur.com_eyG6xyo.jpg


Cut, grind, drill, etc, the metal you no longer need.....come close to the lines scribed around the new stock....I'll round over the face of the new flat tang to make it look good.

i.imgur.com_F31T9et.jpg


Most of the old pistol grip tang is gone and now is some rough shaping with files and a bit of smoothing too.... This conversion just barely exposes the screw hole, no threads lost! All the shaping of the lower tang on these older Dual Tang SN guns must not touch the SN. This job doesn't in anyway!....measure the length of the SN before you attempt this conversion on the old Dual Tang SN guns.

i.imgur.com_T2sFfFU.jpg


The initial fit looks very good...the stock will blend down to the tangs, top and bottom....SN is totally preserved and I'll prolly go ahead and steel sleeve the rear tang screw hole. It helps prevent splitting and cracks and over compression of the stock down the road, maintaining tight stock fit for much longer than wood alone.

i.imgur.com_ZbK22Yn.jpg


Here's how she looks so far...lever still has the silly looking curve but the tang is now correct.

i.imgur.com_OSgcjoY.jpg
 
Tools laid out for cold forging the lever from curved to straight. It helps to have loving support. Mina is always near by when the SmasherWackers come into play!

i.imgur.com_HbhqIvp.jpg


A series of taps and smashes and SmashWacks move the metal just slightly to straight configuration...start with some taps here.....

i.imgur.com_rjAyChv.jpg


Continue with a bar to transfer SmashWacks to the inside of the loop here....

i.imgur.com_GI3PpSf.jpg


Carefully tapping and adjusting and preventing twist or bend and the roughly shaped straight lever looks like so....only about 1/4" of movement is required.

i.imgur.com_OJ8SWJa.jpg


Test fitting and making sure the gun opens, locks and fires and the trigger safety works properly in and out of battery, success, straight tang and a lever straightened by forging. I have also completed initial draw filing of the inside and outside of the lever loop to smooth it up, remove any waves and remove marks from the SmasherWackers.

i.imgur.com_FdmZoWD.jpg


A couple shots just to see how it's shaping up....and I function tested it with empty cartridge cases (empty/no bullets either). It feeds, fires and extracts unbulleted empties without a hitch. Might just have to go to range soon and test fire this lil Marauder Wannabe.

i.imgur.com_MGo8Orv.jpg


i.imgur.com_XagUW2t.jpg
 
Back
Top Bottom