• ODT Gun Show & Swap Meet - May 4, 2024! - Click here for info

1860 Army Blackhawk

A great first rust. Should boil up a medium or darker grey or even black and should be very even and without spots or bare areas.

5.1" barrel just fits in my boiling pot. Add good clean tap water and boil for 15 to 20 minutes.

i.imgur.com_OUViqvW.jpg


Just out of the boil, blown dry with a heat gun so every nook and hole is totally dry and there will be no spots. Loose oxides look fluffy and will be carded away with 0000 steel wool leaving just the hard finish in place.

i.imgur.com_UcSZ8gB.jpg


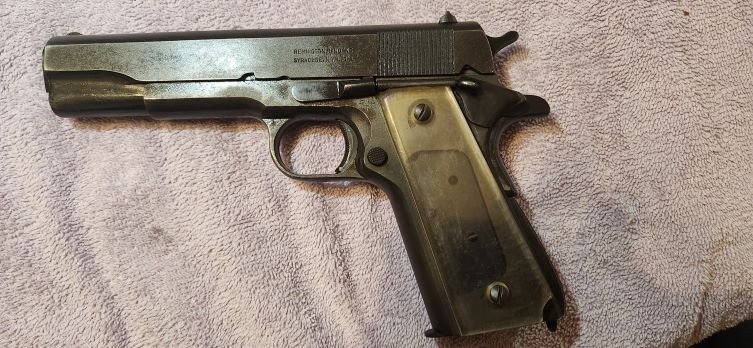
Rubbing out the barrel first, loose oxides off and the first trip thru the rust and boil is a great success. Very dark grey black and totally spot and streak free. Now if I can just keep my fingers off the steel for 4 to 6 more treatments it'll be great.

i.imgur.com_ptKH7m5.jpg


All carded and cooling a bit till I'm ready for the next dry wipe of rusting solution....looking very nice and I think this one is going to blue easy and well. So, two blackhawks blued now by rusting processes....seems they rust well and easily.

i.imgur.com_1rrMwps.jpg
 
Second boil and continued steller results. Black and black and more black.

i.imgur.com_oGfFTXD.jpg


This is only the second cycle and already very black. The finish is very fine grained and coming along quickly. This is after second boil and second carding...just looking over the metal and its coloring.

i.imgur.com_1vOZy19.jpg


i.imgur.com_5haQaVy.jpg


i.imgur.com_aeBtGNU.jpg
 
I've rusted the gun six times. Its showing signs that it's not going to darken further. The oxides after boiling are much tighter and beginning to show silver and red flecks, which I've always taken as a queue that more application of rust producer, boiling and carding will not continue the job forward in any appreciable manner. It's already quite dark and pretty, it appears to be spot and streak free as well. Sitting and rusting once or twice more this morning and we'll see after lunch today.
 
Final assembly and functional prechecks after lunch. Bluing the "Unblueable" Ruger Blackhawk is going along like a Fat Kid with a "Eat Free Hotdogs and Chili Tater Tots Forever Card" at Sonic. I'd say that as far as generating rust, the Blackhawk falls into the easy category....Marlin 336 mag tubes and Win 94s are the doable tuffies but the Blackhawk?....Piece-o-cake. Sure gonna be a dayumsite prettier than Rugers typical factory purple on about 50% of the Blackhawks they make.
 
Fresh off the final boil and carding. A light spray of oil rubbed in while still a bit warm.....

i.imgur.com_CZrPvM3.jpg


i.imgur.com_exLAi5X.jpg


Front of barrel was degreased, gib lock installed and hit with Loctite blue, a dollop of acraglas under the front and rear of the ramp and the ramp screwed into place. Once that was done, the front fire bead was pushed into place with a site pusher. In addition, a new 8x40 front stud (remember, fixin the ejector rod housing from Story required nut and stud vice the factory bolt) is installed tight in the barrel with blue locktite and then carefully filed to final length.

i.imgur.com_vKkVhrW.jpg


The rear sight is installed in the now flattop frame and both it and the ejector assembly checked for function. So far, so good.

i.imgur.com_mR9PakG.jpg


With all the guts cleaned, lubed and installed, the trigger group can be installed on the frame. The mating of 1860 Army Colt to 1974 Ruger Blackhawk is a perfect fit.

i.imgur.com_lsVCfCs.jpg


Now the backstrap is installed and the trigger spring legs placed in their holes in the strap. Full function test at this point indicates full function, no issues.

i.imgur.com_HaSGEht.jpg


The right side grip panel with its stop block is installed.....then the left go's on and I do more function tests and perhaps some completion photos before getting it to the range next week.

i.imgur.com_LY3CxFK.jpg
 
As promised, the Booger photos first. Mistakes, things I fumbleditzed on the project, unforeseen challenges that didn't get over come.

Left side grip panel, not quite square and true to the frame. I still have plenty of time and will probably go back with a skim coat of glass bedding to fix this area up and prevent future panel movements.

i.imgur.com_yn7gaFo.jpg


A bit of overzealous filing to the left, and an air bubble in the casting exposed at right. I'll probably fill the air bubble with a touch of clear epoxy with brass filings mixed in for some color.

i.imgur.com_ekQmyTb.jpg


Managed to mark the barrel at final assembly. This will need touch up to blacken it.

i.imgur.com_zxxFHVL.jpg


The gap between the Bisley Hammer and the Colt Army backstrap as mentioned in prior posts. This, like the left grip panel gap is the least noticeable of the flaws. Not fixable unless I go back and solder a brass plate on the top of the strap and then countour it back down. I think I'll leave this one alone and simple work on correcting the first three Boogers (and any tweeks that may show themselves as needed on function test day).

i.imgur.com_cB20ufr.jpg
 
Back
Top Bottom