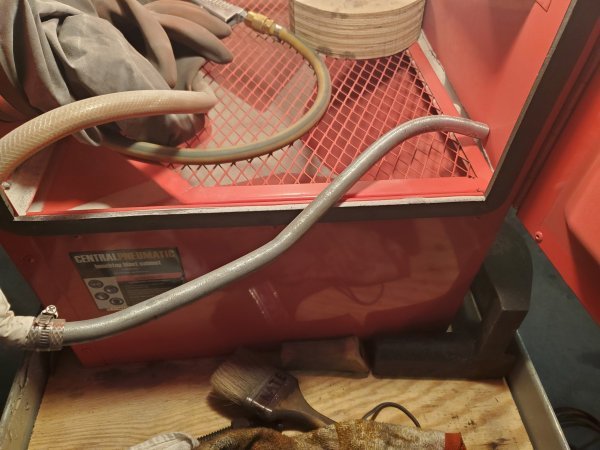
I bought a benchtop blasting cabinet on sale for 100 bucks. Out of the box it was flawed like 99.9% of the stuff you buy from there, but it was cheap, like 99.9% of the stuff there. It was lacking some key features, but i got time, i got tools, and i got a ton of crap laying around that ive been saving for who knows what for who knows how long.
Step 1 - scrape all the factory silicone off and recaulk all the seams inside. I let this cure for at least 48 hours.
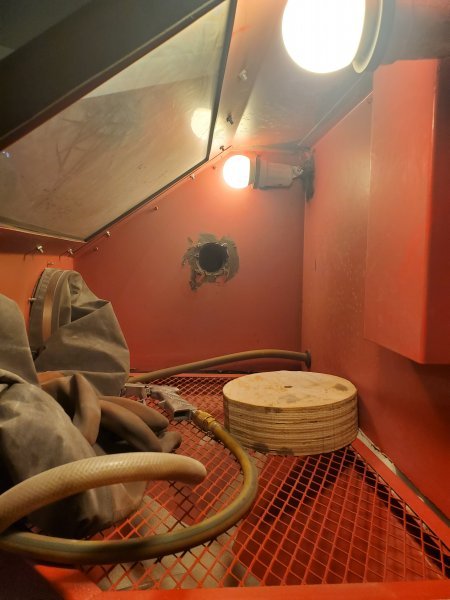
Step 2 - I installed some lights. I bought cheap flood fixtures and drilled through the back of the cab to some steel electrical boxes i mounted to the back. I got a little fancy with a switch, but i guess this isnt necessary. Gaffer tape in the corners of the window brought the glare down. It works better in a dark corner of the garage.
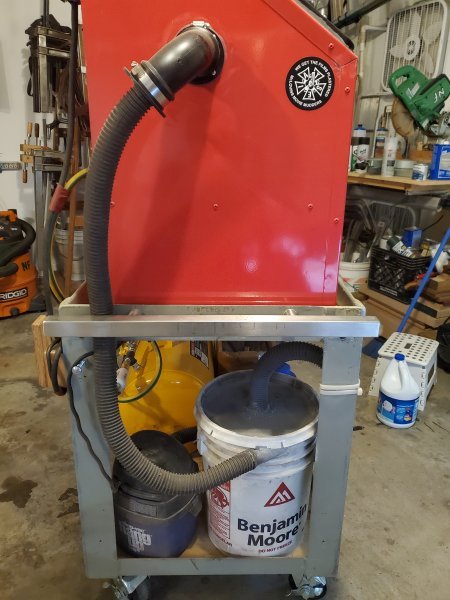
Step 3 - dust collection. I made a cyclone dust collector out of an old 5 gallon bucket. The in line goes in the side, and the out line comes out of the top of the bucket. Sealed well with silicone, it works so good i dont even have a filter in my vacuum right now.
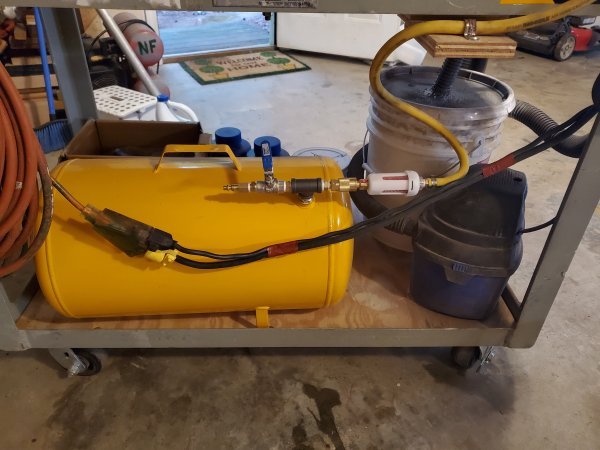
Step 4 - secondary air tank with fliter and cut off. I added this to get more regulated pressure from my small compressor. The compressor is still too small, but this helped immensely, and now i have a to-go air tank. I modified an 11 gallon tank i also got from harbor freight with plumbing adapters and a T. I'll use this set up for my detail hvlp sprayer that i also bought from HF for my cerakote set up attempt. That'll be another thread.
Step 5 - i modified the media collection tube because i felt like i needed a lot of media in the hopper with the original straight pipe. I simply took another light gauge 1/2" pipe i had and bent it into sort of an S shape with small holes drilled at the infeed end.
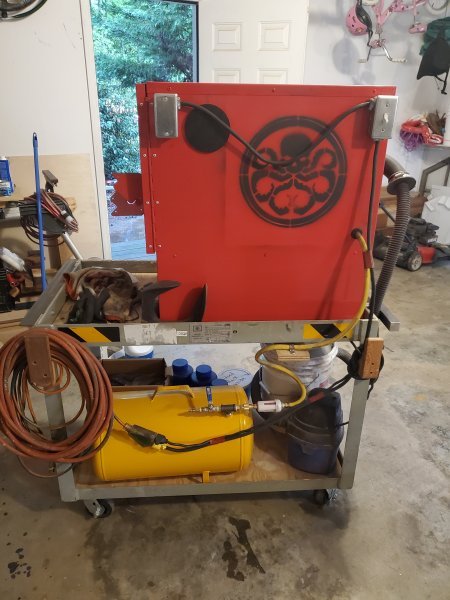
I had a service cart in my garage i use for work occasionally and it worked out perfect to give me a mobile contained set up. It was a fun project that i have about 200 into including the media. Feel free to ask questions.

Step 1 - scrape all the factory silicone off and recaulk all the seams inside. I let this cure for at least 48 hours.
Step 2 - I installed some lights. I bought cheap flood fixtures and drilled through the back of the cab to some steel electrical boxes i mounted to the back. I got a little fancy with a switch, but i guess this isnt necessary. Gaffer tape in the corners of the window brought the glare down. It works better in a dark corner of the garage.
Step 3 - dust collection. I made a cyclone dust collector out of an old 5 gallon bucket. The in line goes in the side, and the out line comes out of the top of the bucket. Sealed well with silicone, it works so good i dont even have a filter in my vacuum right now.
Step 4 - secondary air tank with fliter and cut off. I added this to get more regulated pressure from my small compressor. The compressor is still too small, but this helped immensely, and now i have a to-go air tank. I modified an 11 gallon tank i also got from harbor freight with plumbing adapters and a T. I'll use this set up for my detail hvlp sprayer that i also bought from HF for my cerakote set up attempt. That'll be another thread.
Step 5 - i modified the media collection tube because i felt like i needed a lot of media in the hopper with the original straight pipe. I simply took another light gauge 1/2" pipe i had and bent it into sort of an S shape with small holes drilled at the infeed end.
I had a service cart in my garage i use for work occasionally and it worked out perfect to give me a mobile contained set up. It was a fun project that i have about 200 into including the media. Feel free to ask questions.