I just started this but thought to post some interesting tidbits of web homework. I decided to refresh the sights on Ruger Redhawk that was in poor shape. The sights had pitting and the blue was mostly gone. The sights are solid steel with a plastic insert that you just can't cut plastic stock and file/fit it in the blade. For front sights like S&W with plastic inserts you can pick up a kit from Brownells. http://www.brownells.com/gunsmith-tools-supplies/sight-scope-installation-tools/sight-insert-kits/sight-insert-kit-prod397.aspx
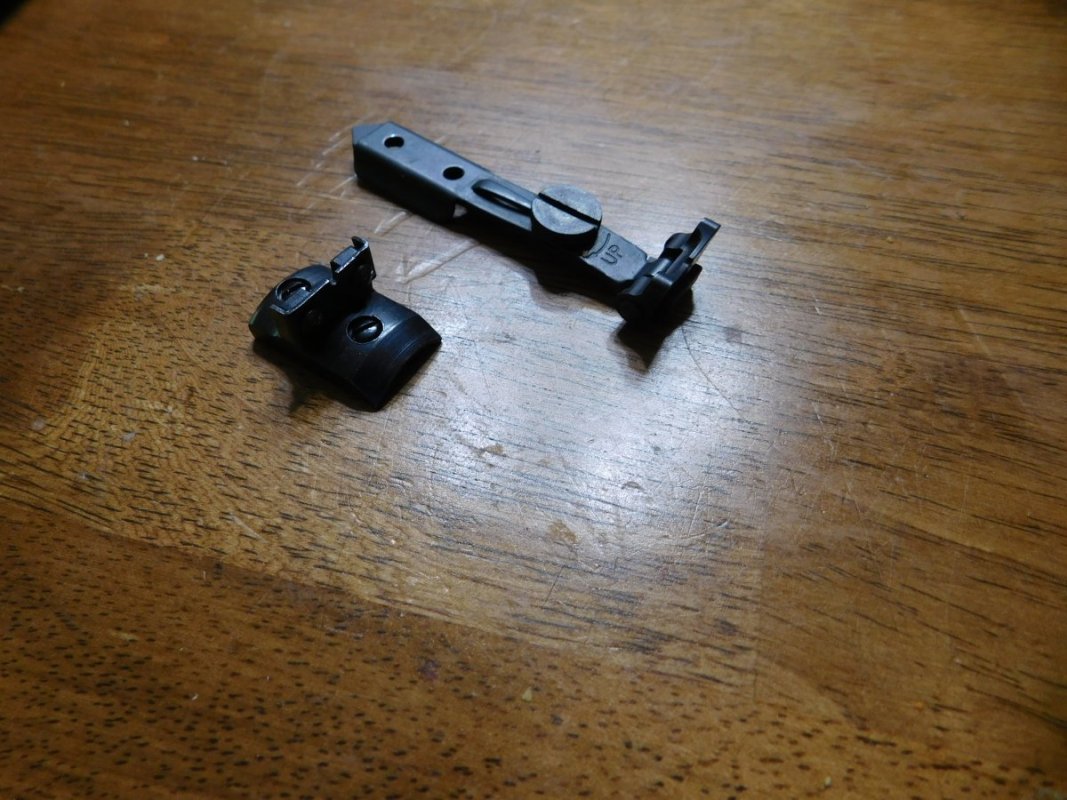
The Redhawk front has a metal loop preventing fitting an insert.

The rear blade is pitted, raw and the white outline long missing.

The rear sight was a bit sloppy and the springs were a bit compressed. The right spring has been stretched a bit and in comparison on the left is the compressed spring.

So what to do with that nasty front blade? I read someone took regular plastic epoxy and filled their front sight in.... Hum easy enough to try as I have some Locktite plastic (7 min.) epoxy on the shelf. The fellow colored it with paint. Well a trip to Wally World and for a buck 77/each I had both red and yellow testors model paint.
The brew! Just take note I had to re-do this as I got way too much paint in the epoxy and it was too soft. Just enough to color the epoxy is all that is required.

I cut the first one with a razor but it was too soft for use, so I re-did it and I used a small file to fit it correctly.

I use cold blue all the time for sights, while it's not as durable, it is but a Q-tip away from being new again. For sights I use a plastic bag and dump the parts/screws in it for a minute or two. They look good!
Before

During

Still need to stretch that left rear sight spring. A screw driver tip serves me well with a flat surface. Care as one slip and it will make a run for it. You can use do this inside a plastic bag if you are worried about a loose spring.

The Redhawk front has a metal loop preventing fitting an insert.
The rear blade is pitted, raw and the white outline long missing.
The rear sight was a bit sloppy and the springs were a bit compressed. The right spring has been stretched a bit and in comparison on the left is the compressed spring.
So what to do with that nasty front blade? I read someone took regular plastic epoxy and filled their front sight in.... Hum easy enough to try as I have some Locktite plastic (7 min.) epoxy on the shelf. The fellow colored it with paint. Well a trip to Wally World and for a buck 77/each I had both red and yellow testors model paint.
The brew! Just take note I had to re-do this as I got way too much paint in the epoxy and it was too soft. Just enough to color the epoxy is all that is required.
I cut the first one with a razor but it was too soft for use, so I re-did it and I used a small file to fit it correctly.
I use cold blue all the time for sights, while it's not as durable, it is but a Q-tip away from being new again. For sights I use a plastic bag and dump the parts/screws in it for a minute or two. They look good!
Before
During
Still need to stretch that left rear sight spring. A screw driver tip serves me well with a flat surface. Care as one slip and it will make a run for it. You can use do this inside a plastic bag if you are worried about a loose spring.
Last edited:


 great write up! thanks!


")