• ODT Gun Show & Swap Meet - May 4, 2024! - Click here for info

3D Printing & TinkerCAD help needed

eldrima

Default rank <1000 posts Lifetime Supporter
Frontiersman
71   0
Joined
Jun 30, 2010
Messages
803
Reaction score
294
Location
Woodstock
SpeedyR SpeedyR Freshly Minted Georgian! Freshly Minted Georgian! StuP StuP Shey Shey Omega Omega rumrunner55 rumrunner55 rbstern rbstern Crochet556 Crochet556 Hayata Hayata

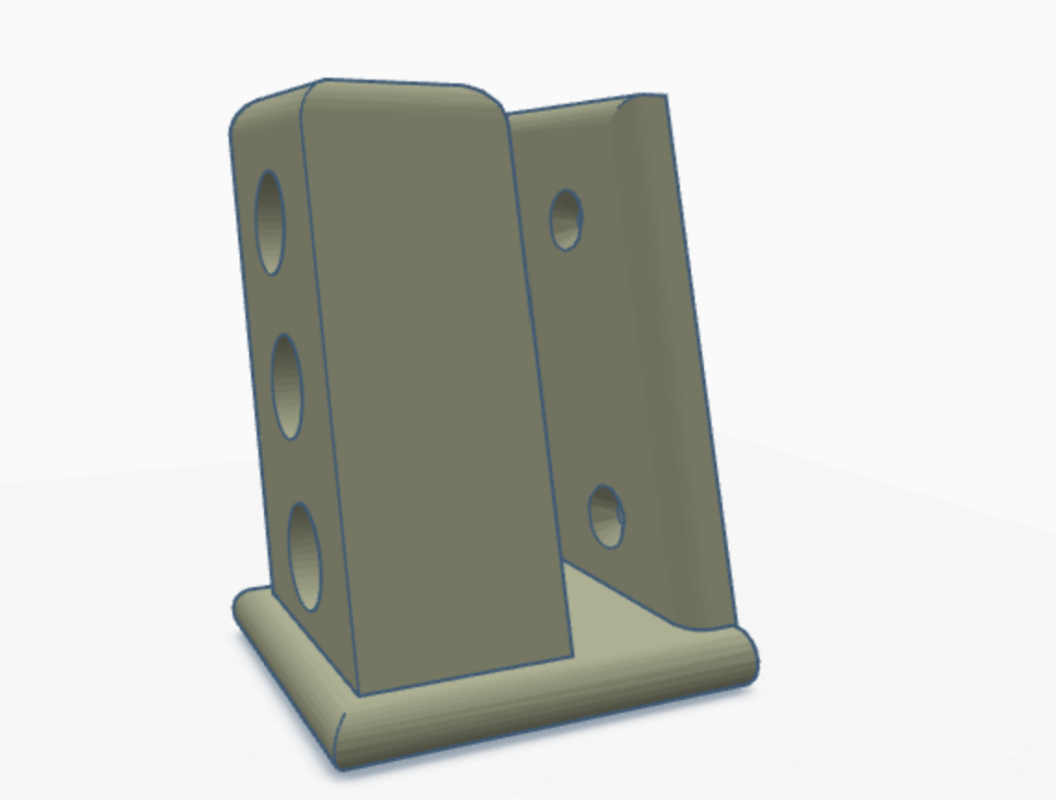
Could use some help ODT. I've recently gotten into 3D printing with an Ender 3V2. Started with printing off a few models I found online. Printing a Glock mount I found on Thingaverse...put it in TinkerCAD and flipped it the other direction then printed in ABS without any issues (I have a thermal lined enclosure). I decided to take that file and alter the dimensions in TinkerCAD to make a mount for my Glock 40 10MM long slide.

To do this, I essentially broke the original piece into 3 pieces: the vertical plane that mounts to the wall, the bottom plane, and the larger piece that goes into the magwell. The magwell piece is the one I most wanted to enlarge so there was less play when inserting it in the 10MM's larger magazine area. I did this, lined the 2 vertical planes up to the bottom plane, grouped them back together, exported the file to Cura and then printed the file.

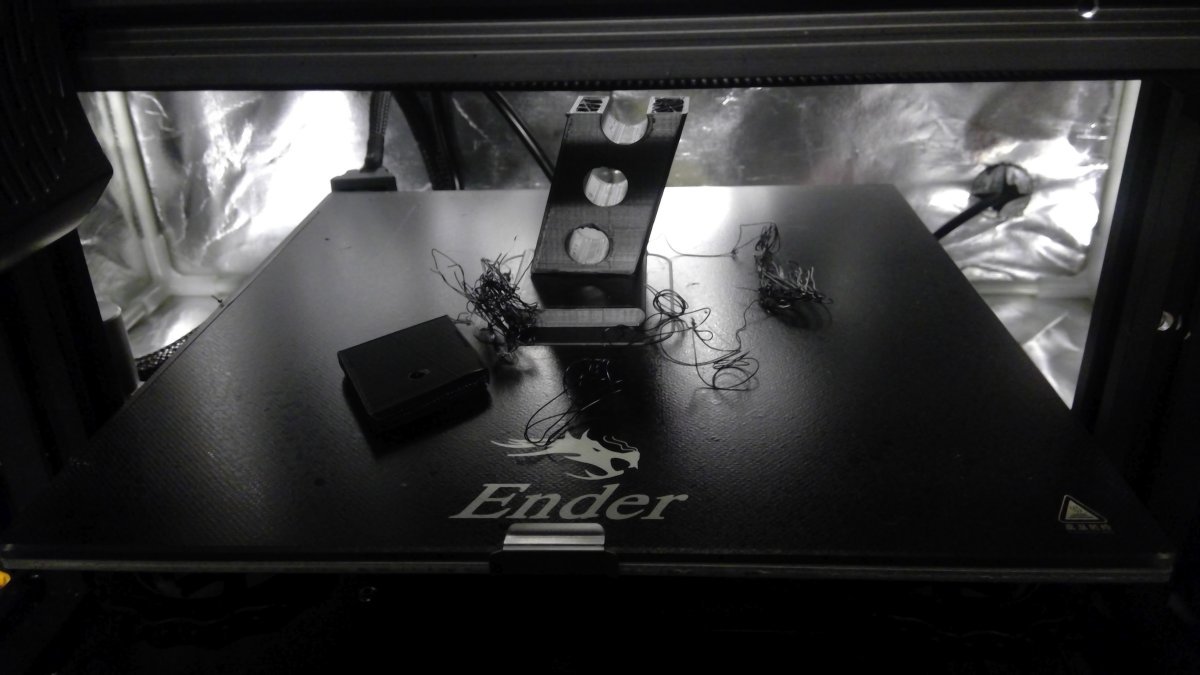
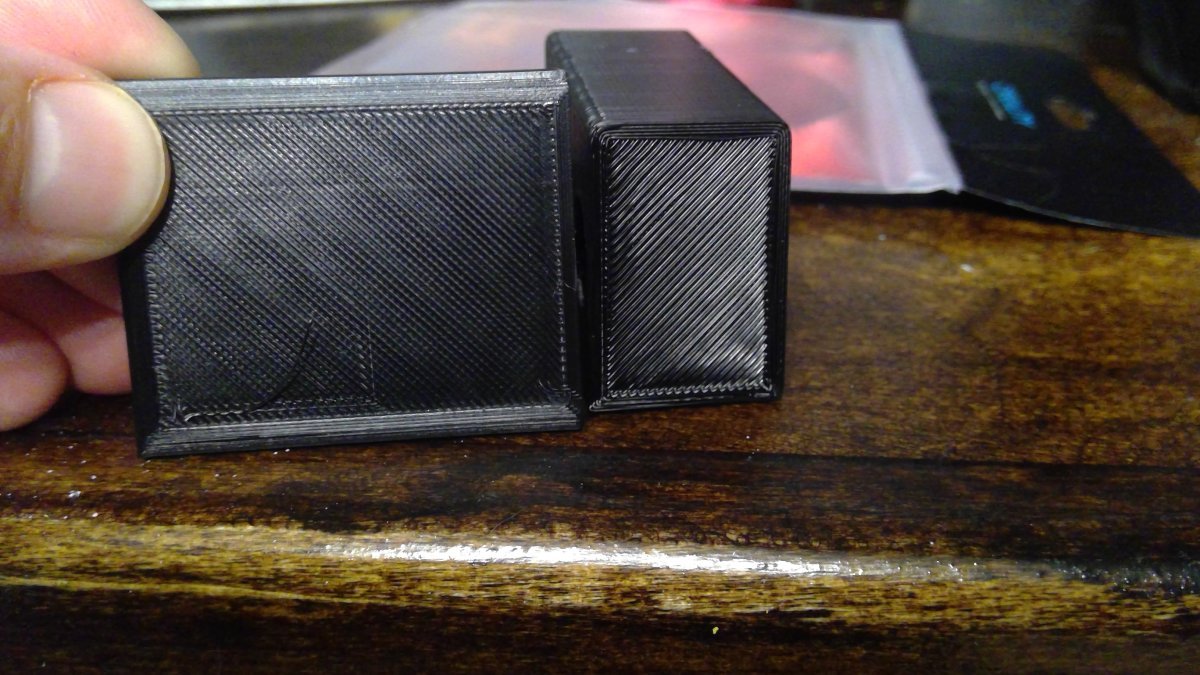
I checked on it every so often then noticed I had a problem a few hours into the print. The smaller vertical plane that attaches to the wall had fallen over so it was trying to lay filament into unsupported space. I stopped the print and when I tried to take the print off the bed, the larger vertical magazine piece came off the bottom plane very easily. I've included a few files of the design as well as the failed results. The second picture is the top of the horizontal plane and the bottom of the mag insert that was supposed to be attached to it.

So what did I do wrong? Should I have recessed the vertical planes 1MM into the horizontal plane before grouping them? Was it some setting in Cura that I should have done differently? I appreciate the help!
 

Attachments

  • WIN_20230604_16_04_31_Pro.jpg
    WIN_20230604_16_04_31_Pro.jpg
    88.6 KB · Views: 12
  • WIN_20230604_16_05_40_Pro.jpg
    WIN_20230604_16_05_40_Pro.jpg
    169.6 KB · Views: 12
  • Glock Mount.png
    Glock Mount.png
    172.3 KB · Views: 12
I haven't used tinkercad but it would appear those two planes didn't actually join. I'm not sure grouping has that effect. Usually if I'm doing that kind of thing I use an extrude to join function.
 
And a link to tinkercad original design. If I'm interpreting correctly those mating surfaces in tinkercad, there was an air gap in the resultant STL between the bottom plate and the two verticals. That resulted in a layer adhesion problem between your bottom plate and your two verticals. That would have been a horizontal gap. You may also have a vertical gap in your bottom plate. Do you need to overlap them 1mm? No, .1mm would suffice but that can't be a 0 overlap or you really n the risk of Cura then interpreting as separate pieces where it should be a single piece. If the joint is 0 or larger integer your layer bond is at risk. Your joint should be a negative before you group.

You printing this at 100% infill I assume, since it appears tombe some sort of wall mount that'll be weight bearing over time, albeit only the weight of a pistol......maybe a pound or two. Even a modest weight may produce some sag over time with a thin bottom plate and light infill. Might consider increasing the thickness of the plate slightly or adding an angled support underneath so it doesn't flex over time.
Good information! I sent you a link to the STL file. I'll ungroup, move the vertical planes closer to the bottom plate, and group again before slicing in Cura.

I don't think I did 100% infill on the original prints but will do it on this one.
 
Thanks for mentioning me but way outside my level of understanding...

Good luck!
You should check out some YouTube tutorials on TinkerCAD....isn't that hard to work in it and the web site is free to use. I like printing out things other people have created but being able to design and print is game changing. Just got to figure out a few of these basics and I'll be good to go.
 
Back
Top Bottom